Home » Tutorials » HL7/FHIR Test Automation and Simulation » Performing a Fake Execution
Suppose that your team is working on creating an HL7 backend. You’re tasked with writing the tests to ensure that the engine works as expected. However, the engine is not actually available for testing yet. You still want to write as much of your validations as possible to speed up development.
When using the Caristix Scenario Editor, you can fake the execution of your tests so that the validation step is fully written.
In this scenario, you’re going to learn how to use the Fake Execution tab of the scenario editor. You’re going to fake a mapping engine that transforms the PID.8 Field – Administrative Sex. Normally, the PID.8 Field’s values are defined by Table 0001 – Administrative Sex. Here, you’re going to transform the standard alphabetical codes to numeric values according to the table below. You can download this table by clicking here.
| Standard Code | Numeric Code |
| A | 1 |
| F | 2 |
| M | 3 |
| N | 4 |
| O | 5 |
| U | 0 |
Overall, your test needs only a single task. That task will pretend to send messages, but will bypass your mapping engine and simply fake the response messages. After that, it’ll validate that the received messages have their PID.8 Field properly transformed.
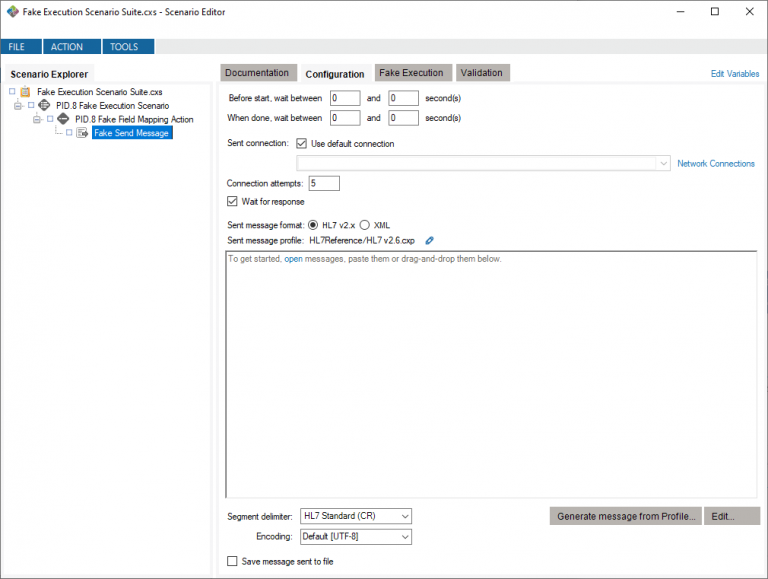
Begin by creating a test suite in the Scenario Editor named “Fake Execution Scenario Suite.” This suite should contain a single scenario, named “PID.8 Fake Execution Scenario”. Add an action to your scenario, calling it “PID.8 Fake Field Mapping Action.” Your action needs only one task, a Send Message task named “Fake Send Message.”
As with the Field Mapping tutorial, you’re going to want to iterate across all possible values in the mapping table and verify that each value is transformed appropriately. Instead of connecting to the Caristix Field Mapping Channel, you’re going to fake the transformation.
Start by adding the following message in the configuration tab:
MSH|^~\&|ADT1|GOOD HEALTH HOSPITAL|GHH LAB, INC.|GOOD HEALTH HOSPITAL|198808181126|SECURITY|ADT^A01^ADT_A01|Example-HL7v2.5.1|T|2.5.1
EVN||200708181123||
PID|1||PATID1234^5^M11^ADT1^MR^GOOD HEALTH HOSPITAL~123456789^^^USSSA^SS||EVERYMAN^ADAM^A^III||19610615|${PID.8}||2106-3|2222 HOME STREET^^GREENSBORO^NC^27401-1020
NK1|1|JONES^BARBARA^K|SPO^Spouse^HL70063||||N^NEXT OF KIN
PV1|1|I|2000^2012^01||||004777^ATTEND^AARON^A|||SUR||||7|A0|
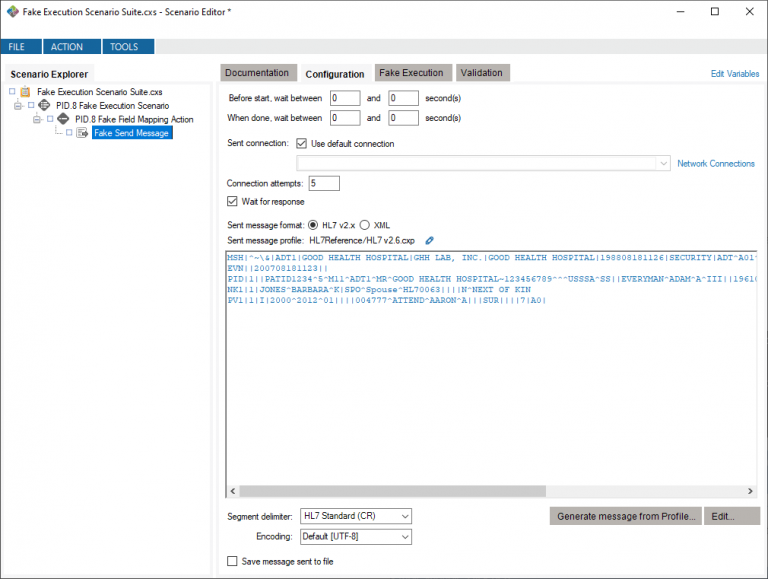
Note the emphasis on the PID.8 field, which is defined by the ${PID.8} variable. You’ll need to add a variable by that name that refers to the first column of the mapping table.
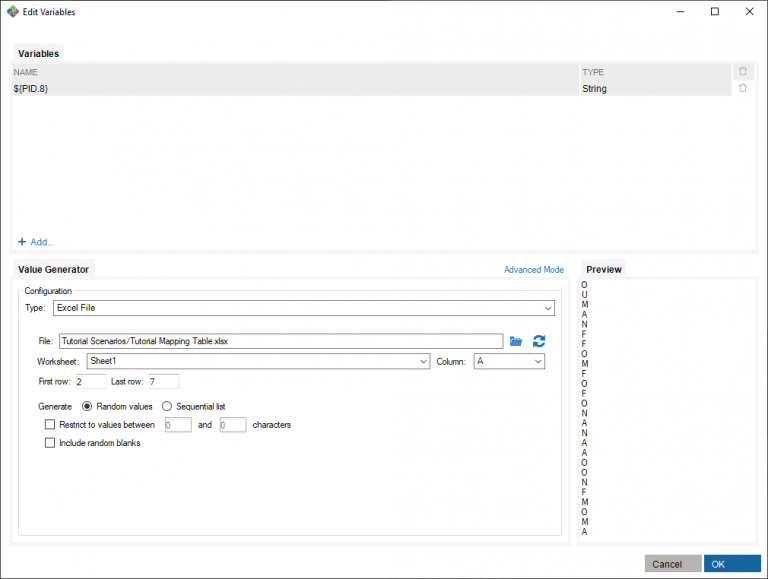
Tip: To get to know how to create a mapping table variable, click here.
You can fake the execution of a task by going into the Fake Execution tab of a task. There, you can use the Scenario Editor’s JavaScript engine to make the test receive specific messages. You can also use Carlang expressions to obtain fields from the sent message.
First, you want to create the newPid8 local string variable, which will be the mapped value of the sent message’s PID.8 value. You’ll first need to create a Scenario Editor variable, called ${GenderMapping}, that defines the mapping table.
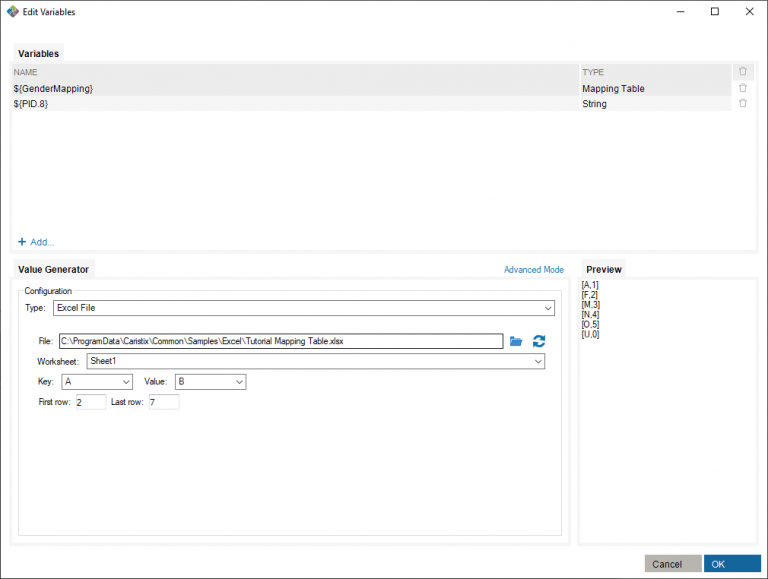
You can use the ${GenderMapping} variable in the Fake Execution tab. Simply define your newPid8 variable as ‘${GenderMapping[@HL7(“PID.8”)]}’ much like you would define an expected transformed value in a validation – the @HL7(“PID.8”) value refers to the PID.8 field of the sent message.
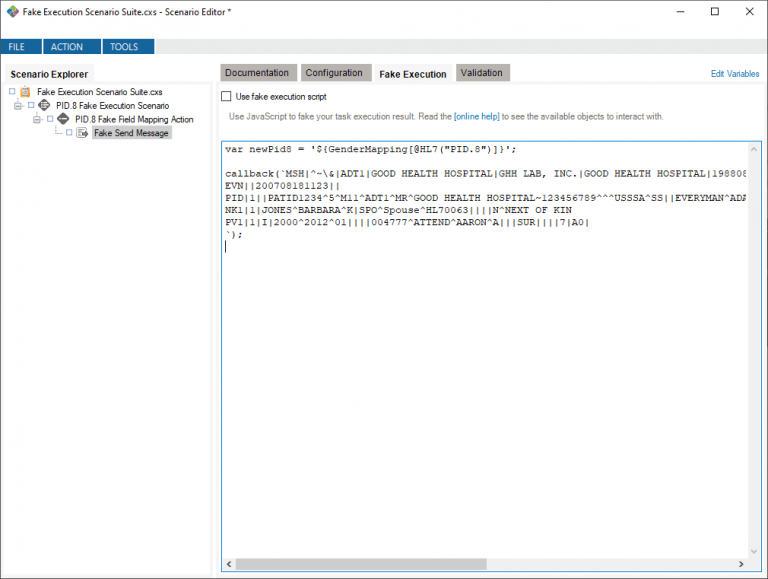
var newPid8 = '${GenderMapping[@HL7("PID.8")]}';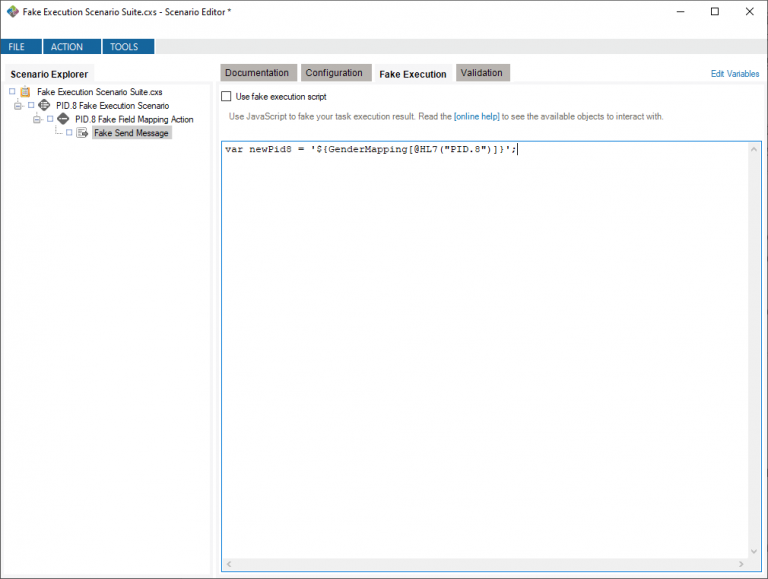
Next, you want your Fake Execution to return a response message. You can return messages with Fake Execution by using the “callback” method, which a string as input and returns the corresponding content to the test’s validation.
You’ll want to provide the return message, which you can copy from the message in the Configuration tab. To preserve the message’s segment terminators, use backquotes to surround the copied HL7 message. You’ll also want to replace the message’s PID.8 Field with the newPid8 JavaScript variable. Overall, the callback method should be used as shown below.
callback(`MSH|^~\&|ADT1|GOOD HEALTH HOSPITAL|GHH LAB, INC.|GOOD HEALTH HOSPITAL|198808181126|SECURITY|ADT^A01^ADT_A01|Example-HL7v2.5.1|T|2.5.1
EVN||200708181123||
PID|1||PATID1234^5^M11^ADT1^MR^GOOD HEALTH HOSPITAL~123456789^^^USSSA^SS||EVERYMAN^ADAM^A^III||19610615|` + newPid8 + `||2106-3|2222 HOME STREET^^GREENSBORO^NC^27401-1020
NK1|1|JONES^BARBARA^K|SPO^Spouse^HL70063||||N^NEXT OF KIN
PV1|1|I|2000^2012^01||||004777^ATTEND^AARON^A|||SUR||||7|A0|
`);
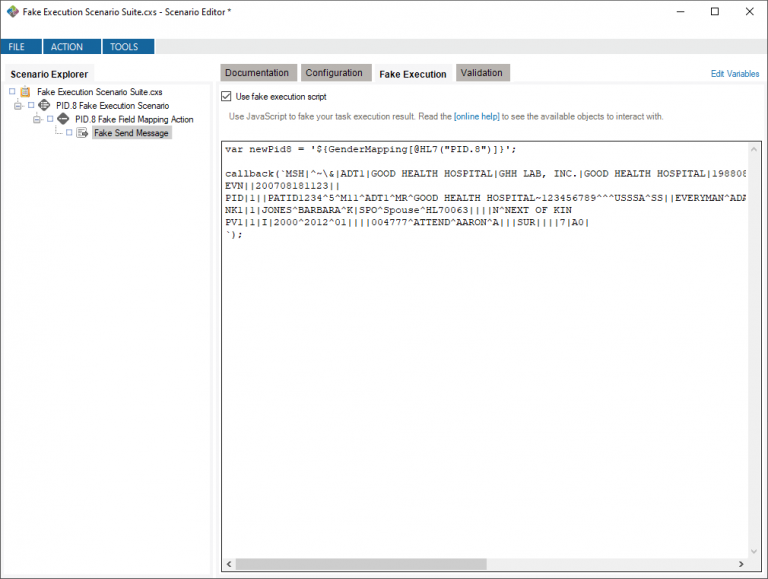
Finally, you need to check the “Use fake execution script” box to make sure that your Fake Execution is performed instead of attempting to send a message to a real connector.
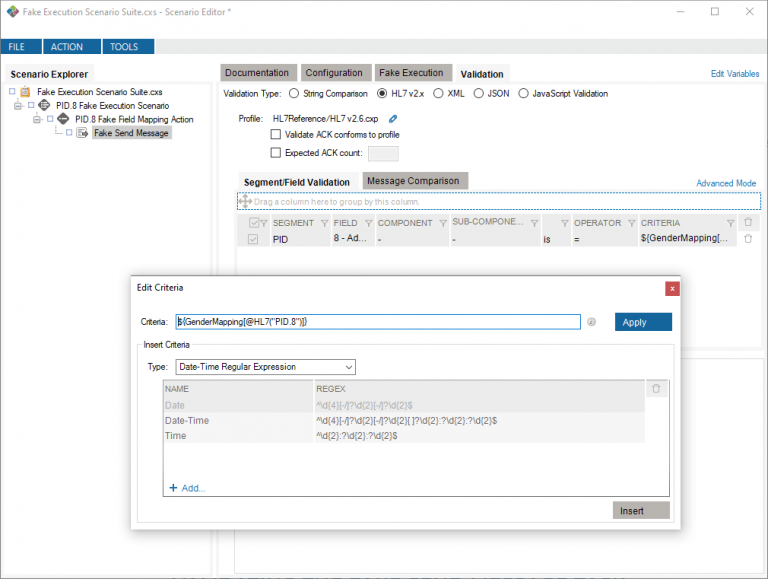
The final step to this tutorial is to simply validate that the fake mapping was performed successfully. In the Validation tab, add a validation for the PID.8 Field. The value of the response’s PID.8 Field should be equal to the sent message’s PID.8 Field when mapped to the mapping table, so the criterion’s value should be the same as the Fake Execution’s transformation: ${GenderMapping[@HL7(“PID.8”)]}.
If you run the scenario, you will see that the test succeeds, despite the task not reaching an external connector.
If you want to view the completed project, you can download the project created during this tutorial and the accompanying Excel document by clicking here. You’ll need to place the Excel document in the Excel samples folder: C:\ProgramData\Caristix\Common\Samples\Excel