Home » Tutorials » HL7/FHIR Test Automation and Simulation » Testing a Field Mapping Connection
Suppose you want to send messages between two HL7v2 systems, but they’re coded with different field values – in other words, specific fields with a given table will have different values to represent the same characteristics. For example, the PID.8 Field – Administrative Sex, which has its values defined by Table 0001 – Administrative Sex, might have standard alphabetical values (A for Ambiguous, F for Female, etc.) in a sending system, while the receiving system would have numerical values (1 for Ambiguous, 2 for Female, etc.) for that field. The value equivalencies are shown in the table below, which you can download by clicking here.
| Standard Code | Numeric Code |
| A | 1 |
| F | 2 |
| M | 3 |
| N | 4 |
| O | 5 |
| U | 0 |
So you set up a mapping engine that transforms the alphabetical values into numeric values.
Now, you want to make sure that the engine works like you think it does. You can use Caristix Test and Caristix Workgroup’s Scenario Editor to automate that verification.
Overall, your test needs only a single task. That task will send messages to a connector that communicates with your engine. After that, it’ll validate that the received messages have their PID.8 field properly transformed.
Begin by creating a test suite in the Scenario Editor named “Field Mapping Scenario Suite.” This suite should contain a single scenario, named “PID.8 Field Mapping Scenario”. Add an action to your scenario, calling it “PID.8 Field Mapping Action.”

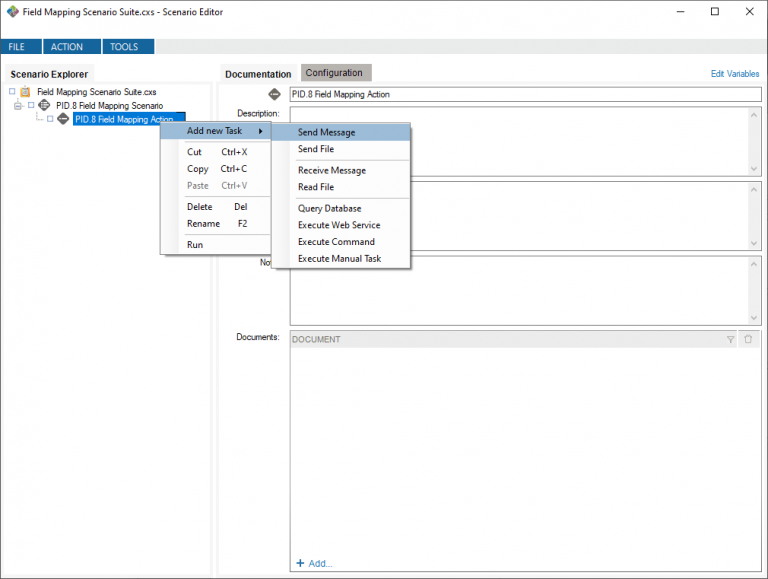
The first step in the test is to send a message to the engine via a Send Messages task. You should add a Send Message task to the PID.8 Field Mapping Task.
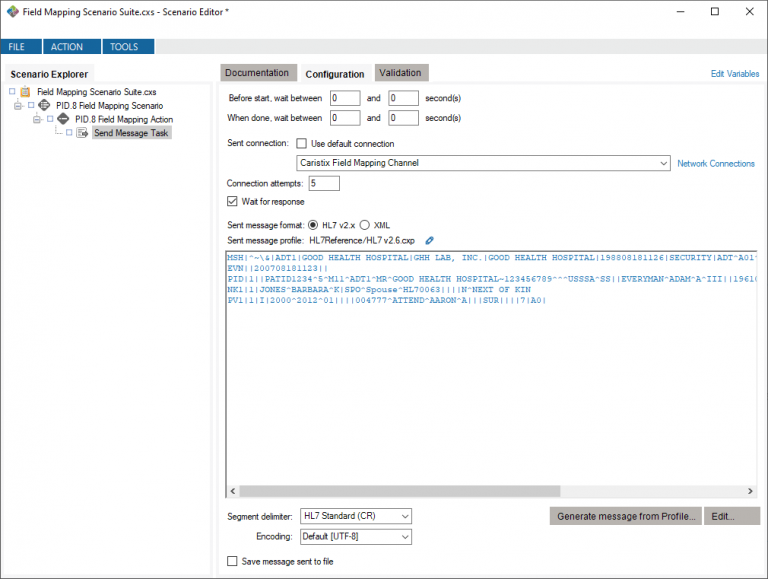
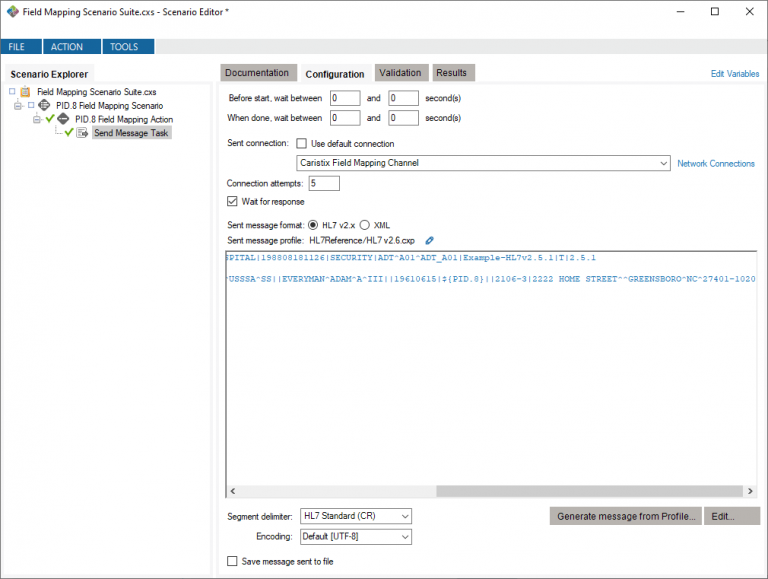
Next, you need to configure the task. Go into the Configuration tab of the task.
The first configuration you need to set is the connection. For the purpose of this tutorial, we provide a public connector that connects to a transformation engine we maintain.
If you followed the getting started tutorial, you can use the connection you created there (named “Caristix Field Mapping Channel”). Otherwise, add a new connection in the Network Connections menu. You can reach this connector using the daas.caristix.com host at IP address 6661.

MSH|^~\&|ADT1|GOOD HEALTH HOSPITAL|GHH LAB, INC.|GOOD HEALTH HOSPITAL|198808181126|SECURITY|ADT^A01^ADT_A01|Example-HL7v2.5.1|T|2.5.1
EVN||200708181123||
PID|1||PATID1234^5^M11^ADT1^MR^GOOD HEALTH HOSPITAL~123456789^^^USSSA^SS||EVERYMAN^ADAM^A^III||19610615|M||2106-3|2222 HOME STREET^^GREENSBORO^NC^27401-1020
NK1|1|JONES^BARBARA^K|SPO^Spouse^HL70063||||N^NEXT OF KIN
PV1|1|I|2000^2012^01||||004777^ATTEND^AARON^A|||SUR||||7|A0|
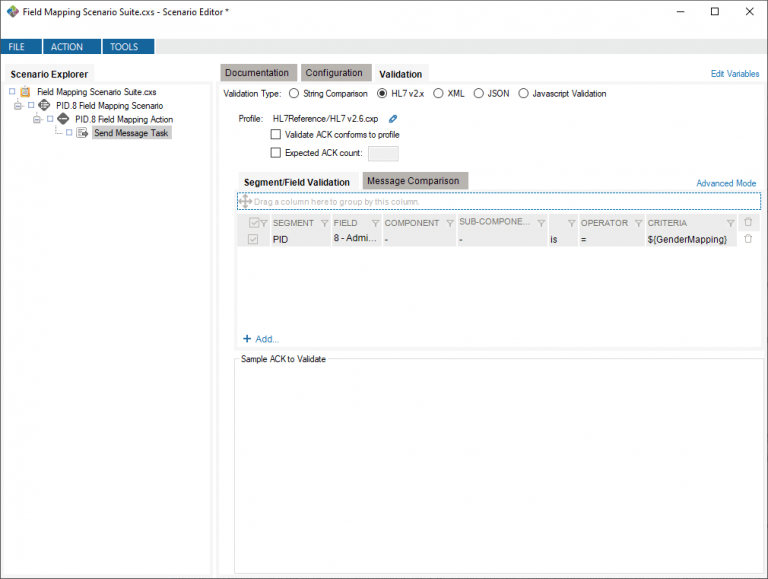
Now, you want to add a validation to the task to verify that the transformation occurred. Open the task’s Validation tab. Since you’re working with HL7v2 messages, the validation type should be “HL7v2.x.”
The goal here is to verify that the PID.8 field’s value was transformed according to the table above. The most effective way of performing this validation is to perform the transformation locally and check it against the message you receive.

To evaluate the transformation, you want to use a mapping table and get the value of the key that corresponds to the PID.8 field of the sent message. That value needs to be the same as the value of the PID.8 field of the received message.
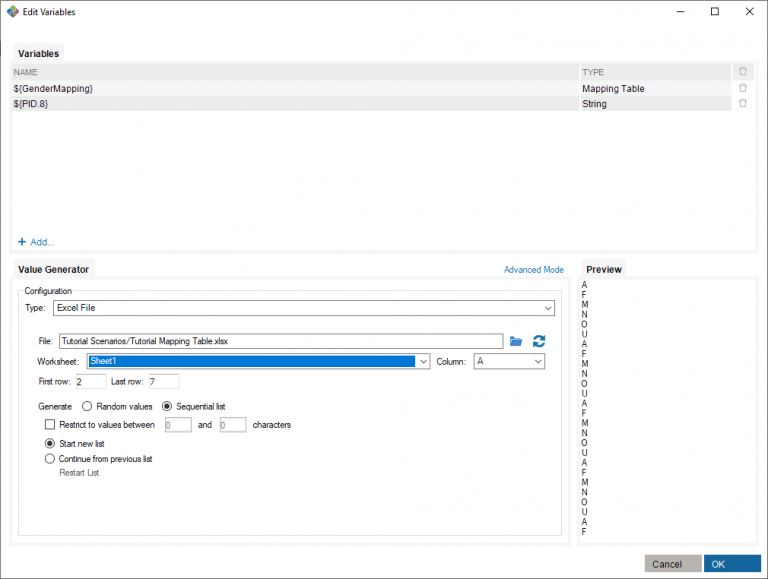
Next, build the mapping table variable from the “Edit Variables” menu. You need to create a variable of type Mapping Table. Name this variable ${GenderMapping}.
A mapping table is a table to which you can provide a key (say, “M”) which will return a value associated with that key. You can use it as a variable by calling ${MappingTableName[Key]}. Using the table ${GenderMapping} to get the value associated with the key “M,” you’d write ${GenderMapping[M]}.
Next, you need to provide a generator for the table. For mapping tables, generators are always Excel sheets, so select that generator type. They represent the mapping table as a simple two-column table spreadsheet. For this tutorial, you can use this reproduction of the desired mapping table.
Use the only sheet available in the document, Sheet1. The Key and Value entries refer to the columns which will be used for the key and column of the mapping table, respectively. The Key should be column A, while the Value is column B. The minimum and maximum rows are limits of the rows that are used to generate the mapping table. Here, use rows 2 to 7 – row 1 contains the column headers, and the following rows contain the table’s key value pairs.

You’ve now created a mapping table that can be called as a variable.
Now, you need to add a validation that verifies the value of the PID.8 Field. Go into the Validation tab of the task and add a new validation. Since you’re checking the PID.8 field, set the Segment to be PID and the Field to be 8. Considering that you’re checking if the field is equal to a value in the mapping table, select the “=” Operator. Next, insert the variable into the Criterion field.
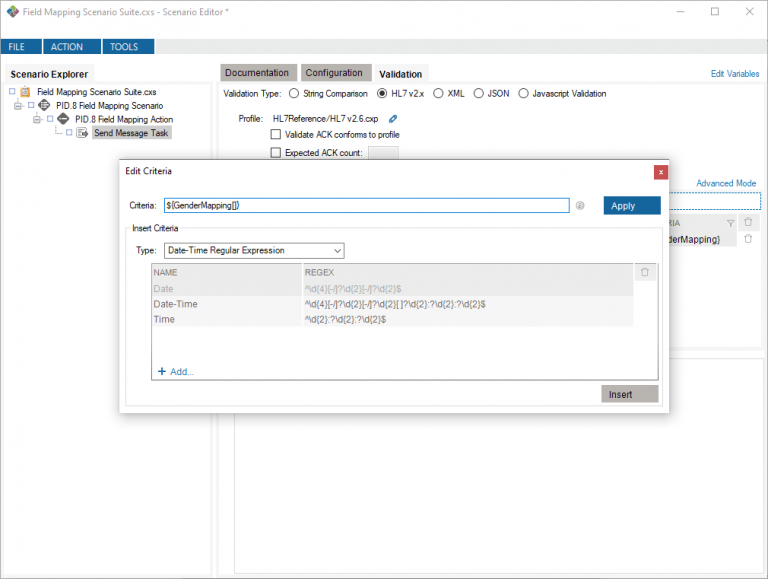
The next step is to refer to the value of PID.8 when using the table. You can refer to messages and their fields using the Criteria Editor. To open the Criteria Editor, right-click the Criteria field and select “Insert Criteria.” When you press the insert button in the Criteria Editor, it will insert an expression according to the criterion type you use.

Upon opening the Criterion Editor, you will see the current value of the Criteria field, ${GenderMapping}. You’re looking to insert a value as a key to the ${GenderMapping} variable, so add square brackets ([]) inside the variable and place the caret between them so the editor inserts there. The criterion should look like ${GenderMapping[]}.
Next, you want to insert a criterion with the HL7v2.x Field Type. When using the Criteria Editor to insert an HL7v2 field, you can provide a task path to indicate from which task you want to get the message – it will look at a sent message in the task’s configuration. If you leave the path blank, the editor will default to the current task, which is the desired result here. You can provide a message index, which again can be left blank as it defaults to the first message. You also need to provide the location of the field, using the Segment code (here, PID), the segment repetition # (you can leave this blank), the Field number (you’re looking at field 8), the field repetition # (again, leave this blank), as well as the Component and Sub-Component numbers, which aren’t used here since you’re looking at the total value of PID.8.
If you click Insert, it will add a value that points to the PID.8 field of your message. The new value should be ${GenderMapping[@HL7(“PID.8”)]}. You can now apply this change. With that, the validation step is complete. If you change the value of the PID.8 field to any other valid value, like “F,” the validation will still be successful.

Once you’ve completed the validation step, try running the test. It should be successful.
But does it truly test what you set out to validate? In fact, it only tests a single value automatically – whatever value you provide to the message. If you want to be absolutely sure that every value is properly transformed, you need to test every case.
You could create a task for every possible value in your mapping, but this scales poorly when you’re testing more complex transformations, or when you’re testing transformations that can hold many values. Luckily, the Scenario Editor offers a way of automatically generating multiple messages with a single task.
Your goal here is to evaluate multiple values of PID.8 while only using a single message template and a single task. The best way to do this is to create a task that’s run multiple times, each time running it with the same message template, but with a different value for PID.8, until all values have been tested. To change the value of PID.8, you’re going to use a variable that isn’t random, but instead follows a predetermined sequence that changes every time you initialize the variable (in other words, every time you run the task).
You want to create a String variable that iterates across a list of values, those values being all the possible alphabetical values of PID.8 for your sent message.
First, go into the “Edit Variables” menu and add a new String type variable, called “${PID.8}.”

Now, you need to use a generator that sequences the values of PID.8. You already have that sequence in the Excel document you used earlier for the ${GenderMapping}, so you can just re-use it here. You can use an Excel document as a Value Generator. Simply specify its location, worksheet, first and last row, which are the same as with ${GenderMapping}. You need to specify only one column, from which the values will be copied for the sequence. Choose column A. Finally, change the generation method from Random Values to Sequential List, to avoid having duplication of values. With this, the variable is complete.
You now need to insert the sequential variable into the PID.8 field of the test message. In the Configuration tab, find the PID.8 field and right-click it. Select the “Set Variable for PID.8…” option, which will prompt you to select a variable which will replace the current value of PID.8. Select ${PID.8}. This will replace the value of the PID.8 field in the message with the ${PID.8} variable.
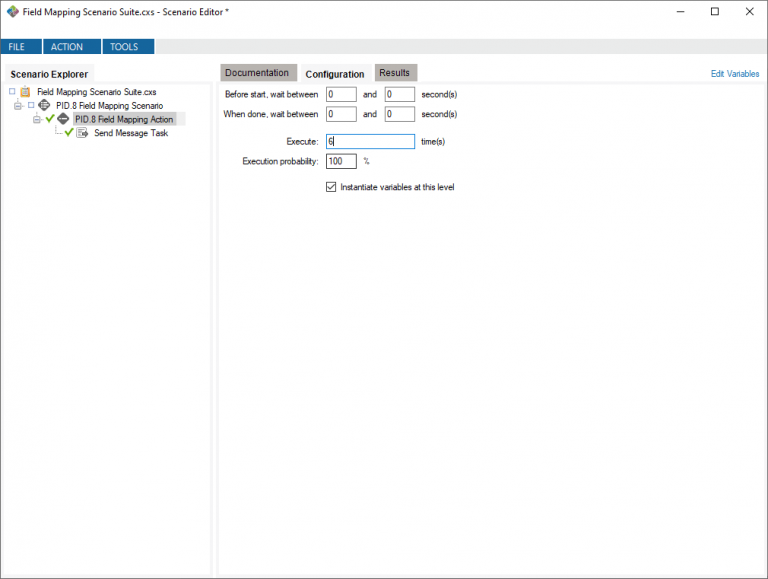
There is one more step before you can run your test. If you ran it now, it would only test the very first value in your sequence. You want to execute the task a number of times equal to the number of possible values your variable can have. You can’t repeat an individual task, though, so you need to repeat its parent action. Select the PID.8 Field Mapping action and go into its Configuration tab. Change the number of executions of this action to 6 – the number of possible values for the field.
Now, if you run the PID.8 Field Mapping Action and view the “Results” tab of the Send Message task, you will see that the task performed 6 times and is successful every time. The PID.8 field in every received message is a different numerical value.
You’ve now successfully tested a field mapping engine using the Scenario Editor. If you want to learn about more testing scenarios, click here to return to the testing tutorials page.
If you want to view the completed project, you can download the project created during this tutorial and the accompanying Excel document by clicking here. You’ll need to place the Excel document in the Excel samples folder: C:\ProgramData\Caristix\Common\Samples\Excel