Home » Tutorials » HL7/FHIR Test Automation and Simulation » Getting Started with Caristix Test
If you want to automate testing with Caristix tools, you first need to install Caristix Test or Caristix Workgroup. Caristix Test is an application that provides you with the Scenario Editor, a framework for testing HL7v2 and FHIR connections. Caristix Workgroup is an application suite that includes Caristix Test’s Scenario Editor.
Now that you’ve installed Caristix Test or Caristix Workgroup, you need a test scenario suite, a workspace where you can create your tests. In this section, you’ll learn how to create a new test scenario suite, document and configure it, save it, and load an existing suite.
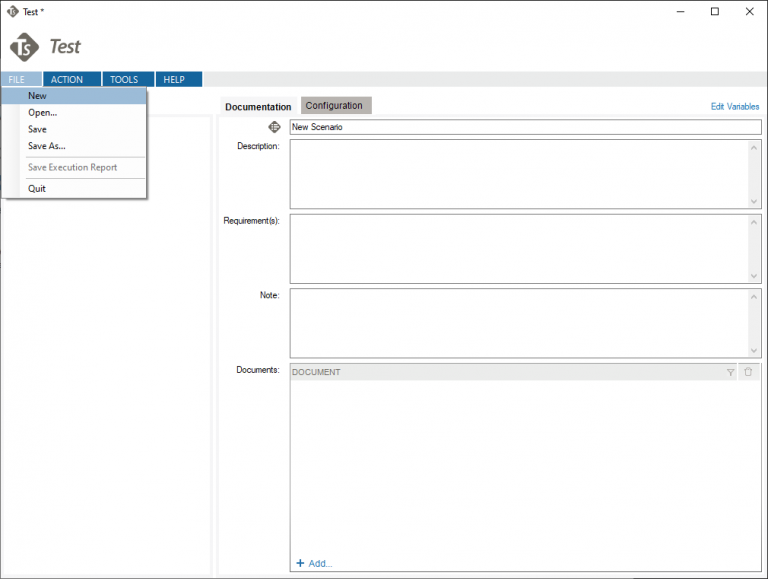
To create a suite in Caristix Workgroup, click on the “Test” menu at the top of the application, then click on “New…”. This will automatically open the Scenario Editor and create a new scenario suite. Inside that suite, there will be a new scenario and a new action.

There is a section for adding documentation to your suite. Simply click on the suite to open it and select the documentation tab.
Here, you can add a description for your suite, along with specific requirements (for example, needing to be able to connect to a specific server) and further notes. You can also add documentation files to the Documents section by clicking on Add and selecting the document you want to add.
You can configure a test suite to wait before starting or after ending and allow it to create global variables by clicking on the Configuration tab of the suite. For the purposes of this tutorial, you do not need to modify these configurations.

In this section, you’ll learn how to create your first test scenario. You’ll learn how to make a connection to an HL7v2 service, how to send a message to it and how to validate the message’s content.
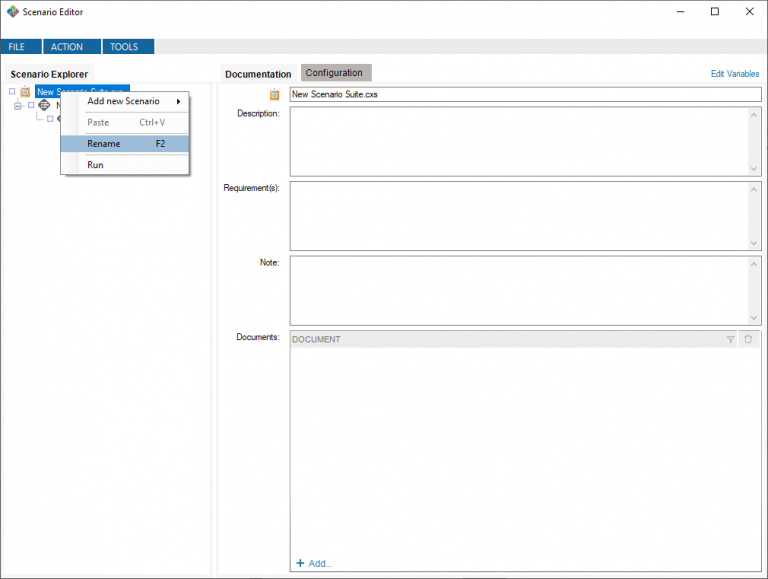
First, you’re going to need to create an empty test scenario. Scenarios are namespaces in which you place tests that are related to each other. To add a new scenario to a suite, right-click the scenario suite and select “Add new Scenario”, and click “Blank.” The scenario will contain one action.

Rename your scenario to “HL7v2 Connection Test Scenario.” You can rename scenarios by right-clicking them and selecting “Rename.”
Next, you need an action for your scenario. Actions are equivalent to individual tests. Each action should be self-contained and independent of every other action. If you need to add an action to a scenario, right-click the scenario and select “Add new action.”
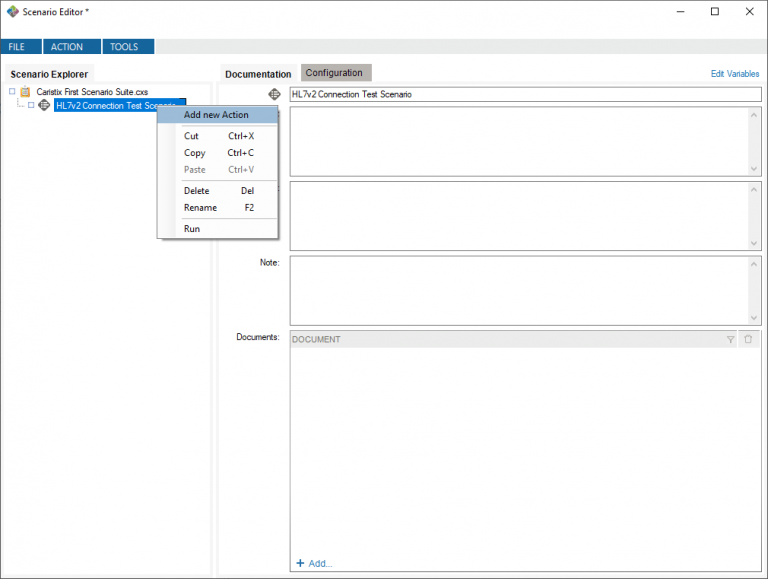
Rename your action to “Test Connection.” You can rename actions by right-clicking them and selecting “Rename.”
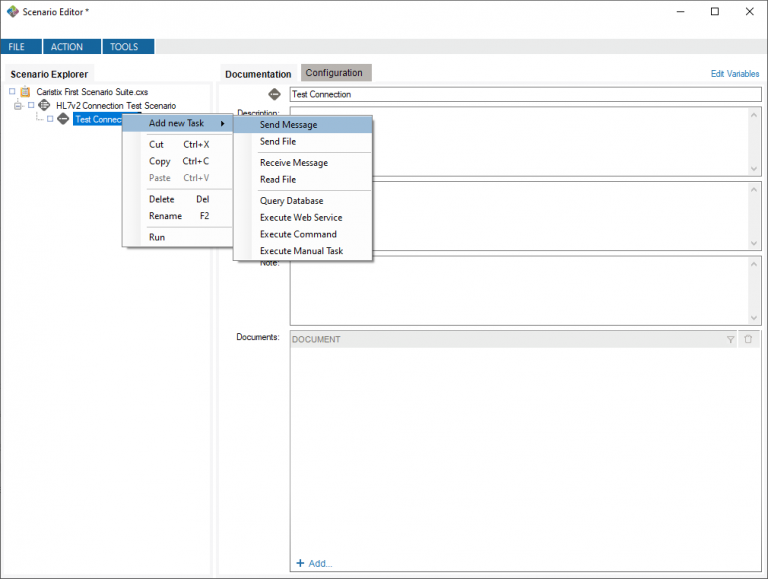
The next part of writing your test is to add a task. Tasks are the individual steps of a test. You can configure tasks to send or recieve messages, to exceute a command or web service, to query a database, etc. After that, you validate the task by deciding the response type and criteria you expect from the task. For example, if you send a message and want the response to be that message, the validation step would be to verify that the message matches the sent message.
To add a task to an action, right-click the action, select “Add new task” and select the task type you want to create. For this tutorial, since you’re first sending a message, select the “Send Message” task type.
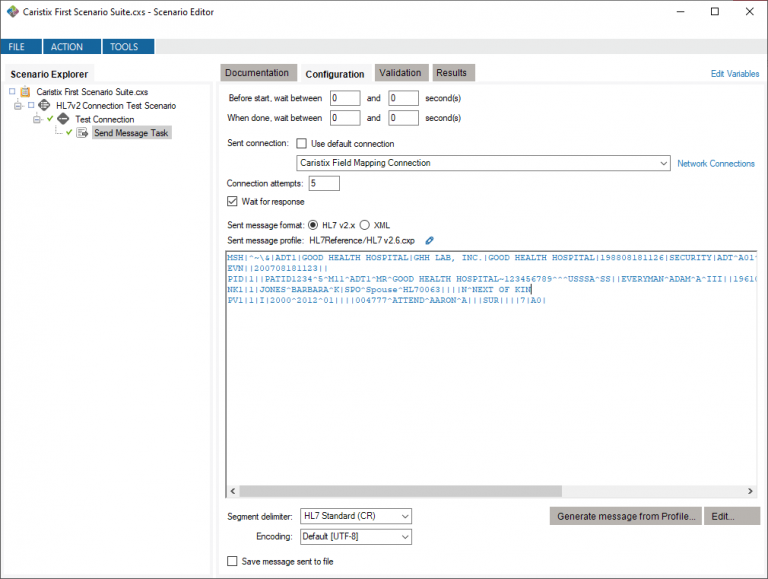
Open the Configuration tab of the Send Message task. Here’s where you’re going to set where you’ll connect to send your message, as well as the message content.
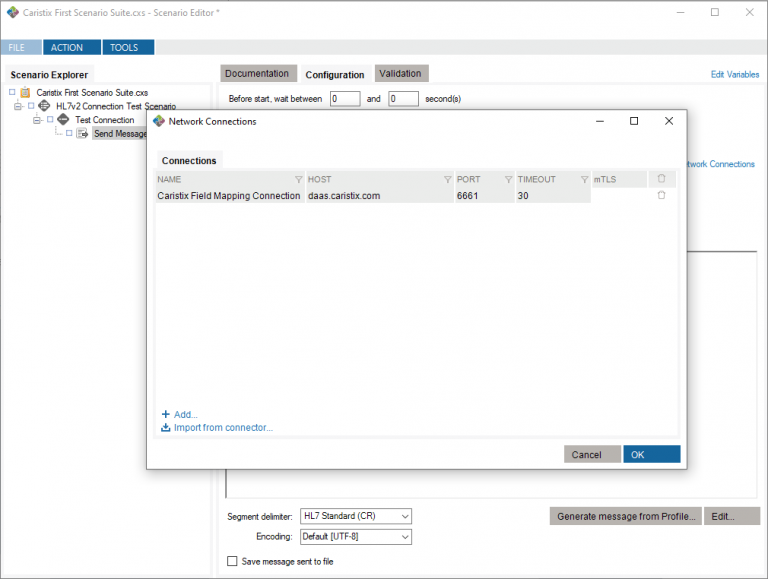
The Sent Connection property dictates the location of your connection. The “Use Default Connection” checkbox tells the program to connect to the computer locally when checked. If it’s not checked, you can specify an external address. Here, you’ll want to uncheck it, and add a new connection by clicking on Network Connections.

In the menu that opens after clicking Network Connections, you can add a new connection by clicking “Add….” A new entry in the connections table will be created. You can modify the fields in the table by clicking them. For this tutorial, you’re going to connect to the public Caristix host at daas.caristix.com, connecting to port 6661, which connects to an HL7v2 engine. Change the respective fields to those values. The name of the connection does not affect the connection itself, but if you want to follow more testing tutorials, you’ll want to name this “Caristix Field Mapping Connection.”
MSH|^~\&|ADT1|GOOD HEALTH HOSPITAL|GHH LAB, INC.|GOOD HEALTH HOSPITAL|198808181126|SECURITY|ADT^A01^ADT_A01|Example-HL7v2.5.1|T|2.5.1
EVN||200708181123||
PID|1||PATID1234^5^M11^ADT1^MR^GOOD HEALTH HOSPITAL~123456789^^^USSSA^SS||EVERYMAN^ADAM^A^III||19610615|||2106-3|2222 HOME STREET^^GREENSBORO^NC^27401-1020
NK1|1|JONES^BARBARA^K|SPO^Spouse^HL70063||||N^NEXT OF KIN
PV1|1|I|2000^2012^01||||004777^ATTEND^AARON^A|||SUR||||7|A0|
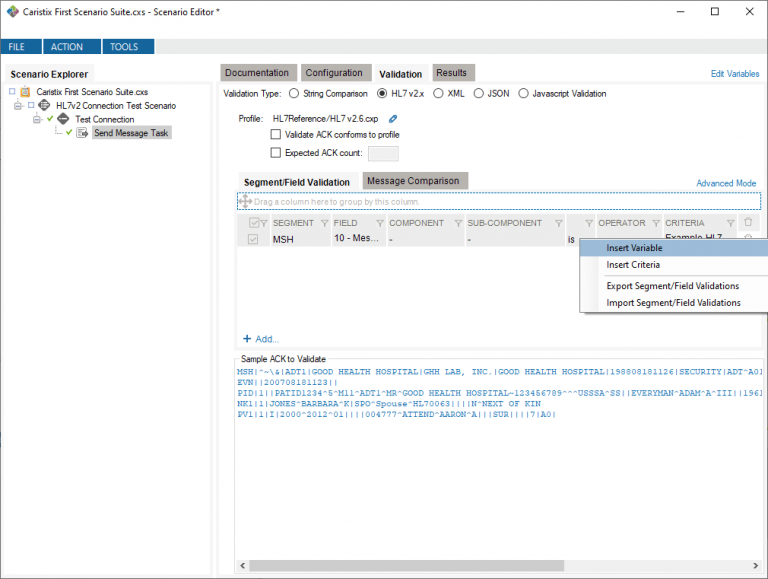
Now that you’ve configured the test, you need to determine how you’re going to verify that the message was sent and acknowledged properly. You do this by using the validation options in the Validation tab of the task. There are several validation types you can use, including verifying the HTTP response (or its JSON body) and comparing HL7v2 messages. Here, you want to do the latter, so make sure to select the “HL7v2.x” Validation Type.

When performing HL7v2 message validation, you have two options for validating the resulting messages. You can either compare specific message fields using the Segment/Field Validation option, or you can compare entire messages using the Message Comparison option. For this tutorial, you’re just going to compare fields. More specifically, you’re going to verify that the Message Control ID is transcribed fully.
The Message Control ID corresponds to the MSH.10 field. Thus, you need to add a validation that the result’s MSH.10 field is equal to the MSH.10 field of the message you send. To do this, you need to add a validation by clicking “Add…” This will add a new validation, for which you can specify a Segment, Field, Component, Sub-Component, an operator (with an is/is not prefix) and a criterion. The operator is the method with which the result should be evaluated, and the criterion is the value to which the message field should be compared if applicable. For this test, the operator should be “=” since you’re checking equality. The value of the criterion should be the same as the sent message, “Example-HL7v2.5.1.”

With that, this validation attempt is complete. Right-click the Test Connection action and select “Run” to run the action.
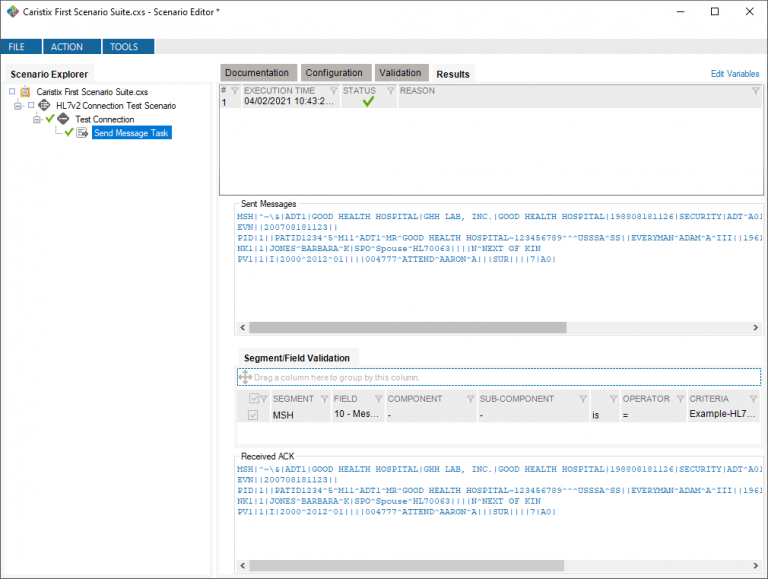
Now, open the newly created Results tab of the Send Message Task. You’ll see that the test is successful, as well as all the validations you performed along with their success status.
Sometimes, you would want to generate the parts of the message you’re testing automatically. For example, It could be because you’re testing multiple values and don’t want to repeat the same message multiple times. It could also be because you want to use a random value to avoid sending the same object every time you run your test. Cases like this are why you’d want to use variables. The Scenario Editor provides a way to automatically initialize variables by configuring a generator, allowing you to insert those variables in HL7v2 messages as well as FHIR resources in both the configuration and validation steps of your tests.
To try variables out, you’re going to replace the Message Control ID of the sent message in your test. You’re also going to use the same variable during validation.
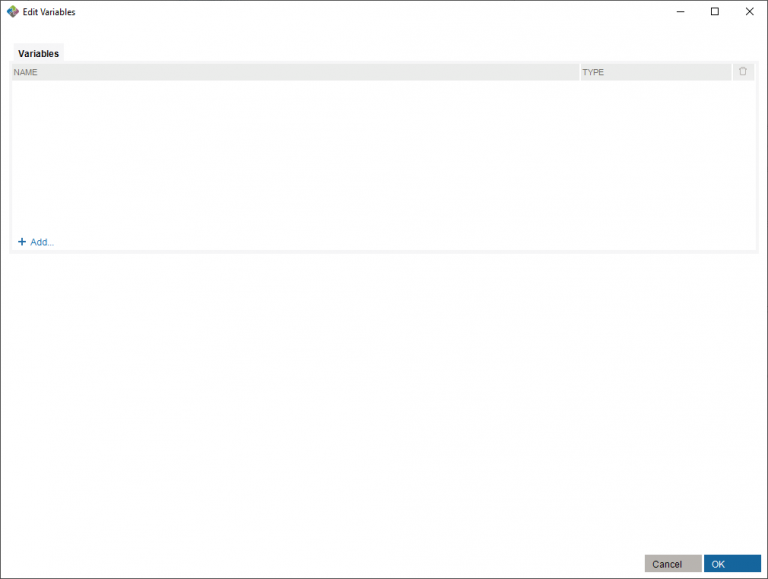
Now, add a variable by clicking the “Add…” button. A new variable with the name ${New Variable} will appear. You should give it a significant name – for this tutorial, you can use ${MsgCtrlId}. Using the ${} to surround the variable name is necessary for the parser to know that a substring is code and not a literal value.
You can also select the variable’s type with the variable’s Type field. Types include strings, numbers, dates, mapping tables, etc. Generally, the type you use should correspond to the data type of the fields in which you’ll be using the variable, if applicable. For your test, since the data type of the MSH.10 is a string, you can use a String type.
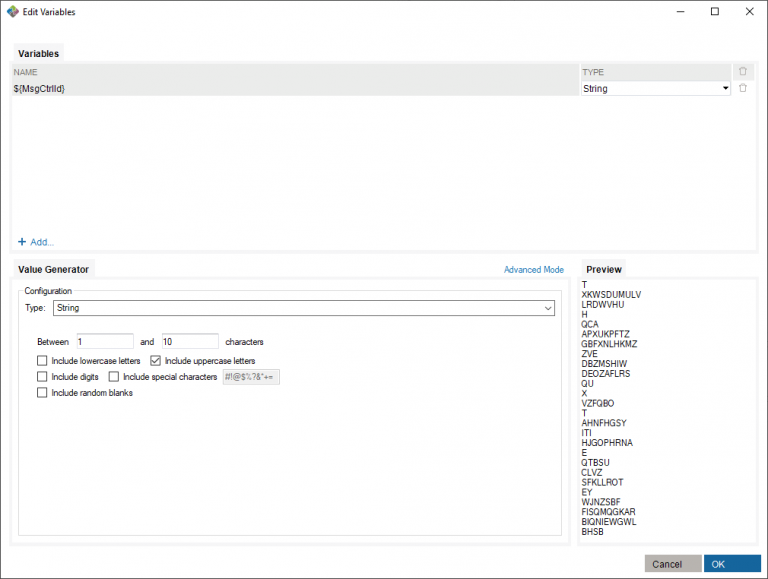
Next, you need to configure the variable’s value generator. Once again, you need to choose a type for the generator. The generator type will dictate the rules you use. It also doesn’t necessarily have to be of the same type as the variable – only valid generator types are shown for a given variable type. For this tutorial, you can keep the String generator type, which will generate a random string with the parameters you provide.
You can see a preview of possible values that the variable can have to the right of the generator. If you check the “Include digits” box, notice how the previewed values change too so that variables contain digits. This is valid for the Message Control Id, so you can keep that property checked.

With that, you’ve created your variable. You can click OK to save it in the Scenario Suite.
Now that you’ve defined the variable, it’s time to use it in the context of your test.
First, you need to add it to the message you send in the configuration tab of your Send Message Task. The most practical way to do this is to right-click the MSH.10 field of your message and select “Set Variable for MSH.10…”

From the menu that opens up. You can select the variable you want to use – the one you just created. This will replace the value of the MSH.10 field in your message with ${MsgCtrlId}. When you run the task, the generator will automatically assign a value for that variable and use it for the message.
Now, you need to add the variable to the validation step. Go into the Validation tab and right-click your validation’s criterion. Select “Add Variable,” and the same menu as before will appear. Selecting a variable will replace your criterion value with the variable.
Finally, run your action once more. If you go into the Results tab again, you’ll see that the message you receive has a new value for the MSH.10 field, but the validation still succeeds.
Congratulations, you’ve created your first automated test with Caristix Test! If you want to learn about how to test specific scenarios, click here to return to the testing tutorials page.
If you want to view the completed project, you can download the project created during this tutorial by clicking here.