Home » Tutorials » HL7/FHIR Test Automation and Simulation » Testing the Capabilities of a FHIR Server
In this tutorial, you’ll be learning how to use Caristix Test Caristix Workgroup’s Scenario Editor to test the capabilities of a FHIR Server. You will test the GET, POST, PUT and DELETE methods of a RESTful FHIR Server.
To perform your tests, you’ll need to create a Scenario Suite that contains multiple tests, each one testing out one RESTful method.<

The first test you will perform is to validate that when you perform a GET method on a FHIR Server’s Patients, the resources that are returned to you are of type Patient. When you use the GET method without providing an ID, you call the FHIR Server’s search method, which will return the resources that correspond to the resource type.
First, create an action called “GET” and populate it with an Execute Web Service task. Execute Web Service tasks allow you to connect to a server’s Web Service and perform HTTP GET/POST, REST and SOAP actions on it. Here, you’re only interested in performing REST actions.
Rename your Execute Web Service to “GET Patients”.

Now, you need to configure the GET task so that it can obtain Patients from the FHIR server. Open the task’s Configuration tab.
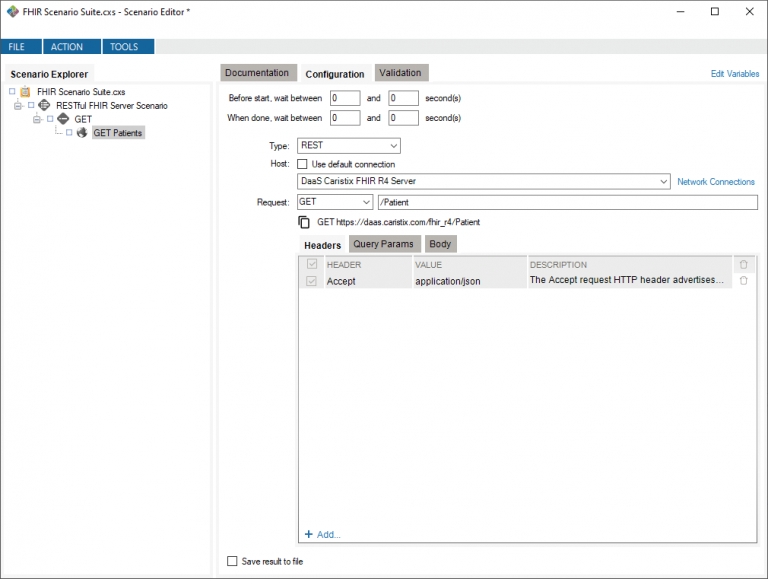
Since you’re working with a RESTful server, the task Type should be set to REST.
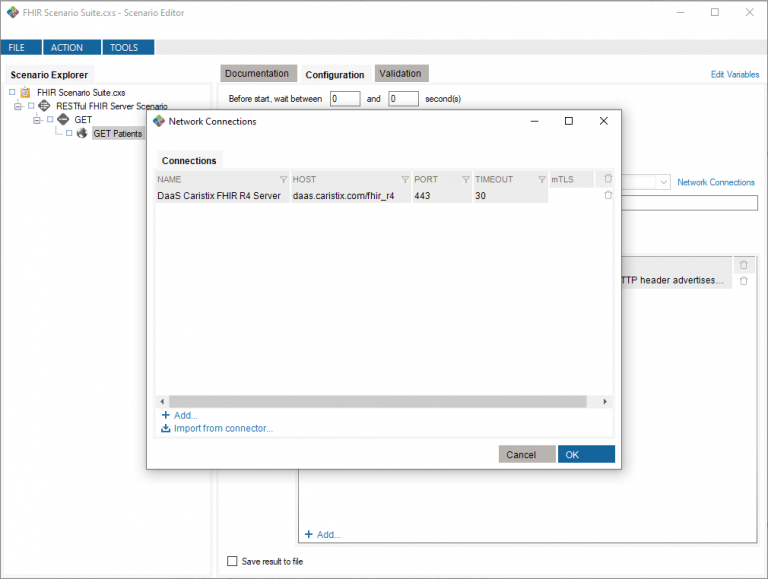
You’ll be connecting to a FHIR Server for all your tests, so go ahead and uncheck “Use default connection” and add a new connection in your Network Connections. Caristix provides a public server named DaaS Caristix FHIR R4 Server for testing. You can connect to it using the daas.caristix.com/fhir_r4 host under port 443.
Now that you’ve got a network connection to a FHIR server, you’ll want to decide on the method for communicating with it. You’re performing a GET action, so you want to use the GET Request. Change the Request method to GET.
Finally, before running the task, you’ll want to specify the resources you want to obtain from your server. For this tutorial, you want to get a list of Patients, so type “/Patient” in the textbox next to the Request method. You can see the full HTTP request you’ll be making just below the Request method box.
The goal of this test is to verify that the resources you obtain are of type Patient, so you’ll need to add a validation to verify that that’s the case.
Go into the Validation tab. Since you’re interested in the results of the request, select JSON, which will allow you to see the results of the request as a JSON object like FHIR resources
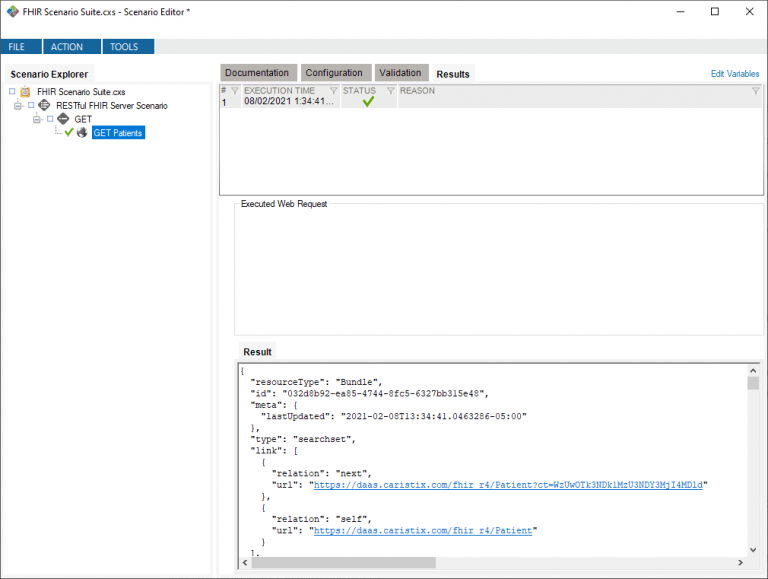
Now, run the test to see the response you get. Go into the Results tab and you’ll see that you get a Bundle resource. The Bundle contains a list of resources that are relevant to the search you performed. This list is found under the entry property of the Bundle. For example, the /Patients request will return a Bundle with many Patient entries, each of which is a Patient resource.
Now, you can perform some real validations for the resources you obtained. For an this test, you’re just going to verify that the first result you obtain is actually a Patient resource.
Go into the Validation tab again. You can select one of two methods, either JSON Path Validation or JSON comparison. Here, since you’re evaluating a specific entry in your Bundle and not comparing the entire Bundle, you’ll want to use the JSON Path Validation.
JSON Path Validation allows you to pinpoint the exact location in a Resource that you want to evaluate, and compare it to a criterion using an operator, much like Segment/Field Validation in HL7v2 validation.
You want to evaluate the Patient resources’ resourceType, so you want to look for the property at the path entry[0].resource.resourceType. There are two ways to go about this. If you know the exact path to the desired property in the JSON, you can simply click “Add..” and enter that path. If you don’t know the path, you can right-click the property directly in the JSON tree and select “Add Validation.” In either case, you’ll now have a reference to the property in your validation rule.

Next, you need to decide what kind of comparison you’ll be making. The operator you want for this is “=,” since you’re verifying for equality.
Finally, you need to provide a value to compare to. Here, you want to verify that the resource’s resourceType is “Patient”, so you should use that as a value.

The POST method allows you to add a resource you created to the FHIR server. Effectively, it calls the create method on the FHIR Server, which creates a resource using the provided payload. The ID of the resource is generated automatically. To use the POST method, you need to provide the method with a payload – the method’s body.
First, add a new action to your scenario and name it “POST.” Add an Execute Web Service task to that action, “POST Patient.”
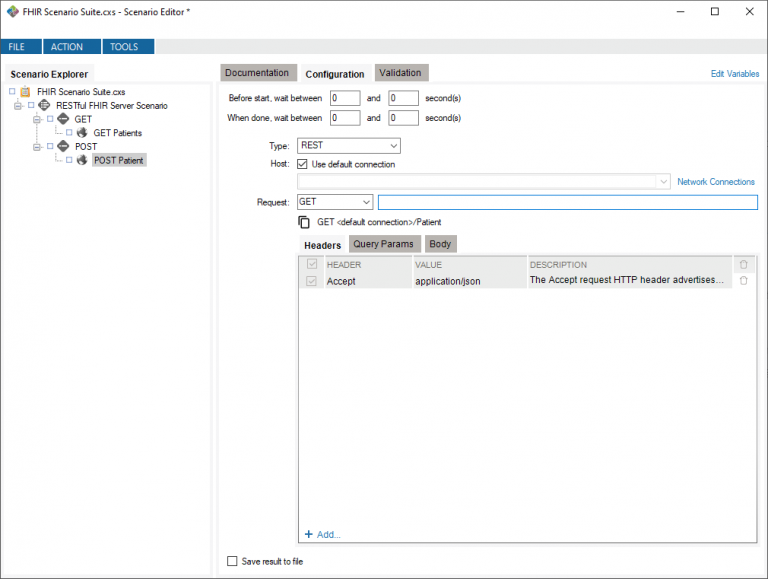
Just like with the GET test, you’ll want to configure your test. You want to perform a REST Type task, and use the same connection as before and have the same request url (/Patient). The Request type should be POST.

Now that you’ve configured your task to perform POST requests, you need to provide a payload – the resource you’ll be adding to the FHIR server. You can do so by writing a value in the Body tab of the task’s configuration section. When you post a resource to a FHIR server, the unique id of the resource is randomly generated to avoid conflicting with other resources on the server, even if you provide an id value yourself.
You’re adding a Patient, so the resource must follow the Patient’s structure definition. You can use the JSON format Patient resource provided below, based on this example. If you want to view this resource separately, click here.
{
  "resourceType": "Patient",
  "id": "${ResourceId}",
  "identifier": [
    {
      "use": "usual",
      "type": {
        "coding": [
          {
            "system": "http://terminology.hl7.org/CodeSystem/v2-0203",
            "code": "MR"
          }
        ]
      },
      "system": "urn:oid:0.1.2.3.4.5.6.7",
      "value": "654321"
    }
  ],
  "active": true,
  "name": [
    {
      "use": "official",
      "family": "Donald",
      "given": [
        "Duck"
      ]
    }
  ],
  "gender": "male",
  "contact": [
    {
      "relationship": [
        {
          "coding": [
            {
              "system": "http://terminology.hl7.org/CodeSystem/v2-0131",
              "code": "E"
            }
          ]
        }
      ],
      "organization": {
        "reference": "Organization/1",
        "display": "Walt Disney Corporation"
      }
    }
  ],
  "managingOrganization": {
    "reference": "Organization/1",
    "display": "ACME Healthcare, Inc"
  },
  "link": [
    {
      "other": {
        "reference": "Patient/pat2"
      },
      "type": "seealso"
    }
  ]
}


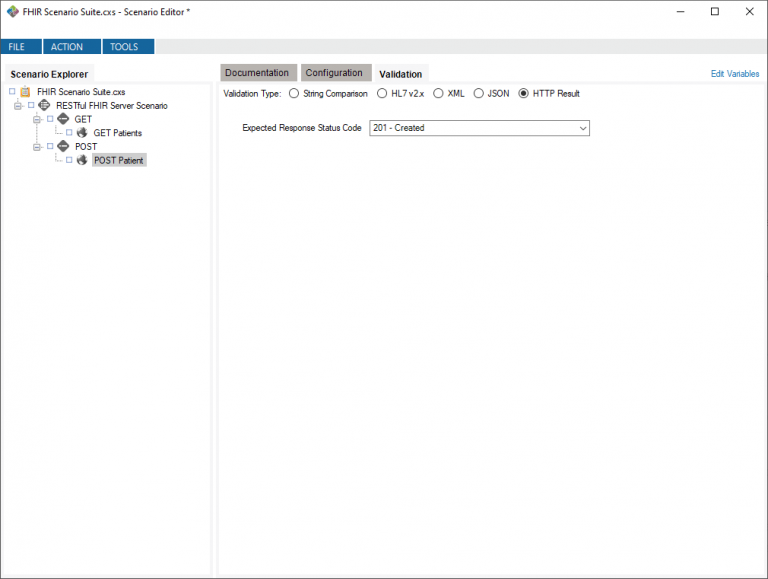
When you create a resource successfully, FHIR servers return a 201 Created response. When a POST request is made, you create a resource. Therefore, the server will return a 201 Created response if your test was successful.
Thus, adding a validation on the HTTP response type is sufficient. Go into the Validation tab of your task. Make sure that the “HTTP Result” validation type is selected and select the “201 – Created” response as the expected response.
If you run the test, you’ll see in the Results tab that your test was successful.
The PUT method allows you to create or modify a resource with a specified ID using the FHIR server’s update method. If there is no resource with the provided ID in the server, it will be created. If the resource exists, it will be updated to the provided payload.
If you use the PUT method on a new resource, the response will be 201 Created. However, if you use the PUT method on an existing resource, the response will be 200 OK. This means that if you do not change the ID of your resource every time you run the test but expect a specific HTTP response, you will not get consistent results – either the first run of the test will fail, or all subsequent runs will fail. To prevent such a failure, you’ll need to use a randomized variable for the ID.
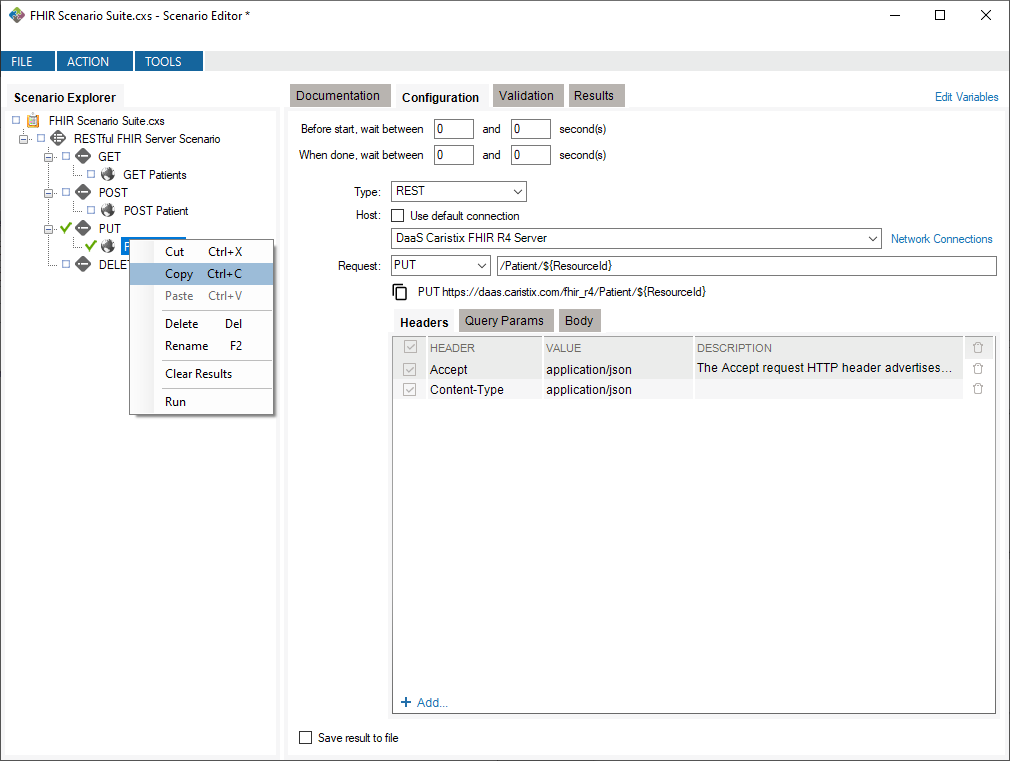
To start this test, create an action called “PUT” and add to it another Execute Web Service task with the name “PUT Patient.”
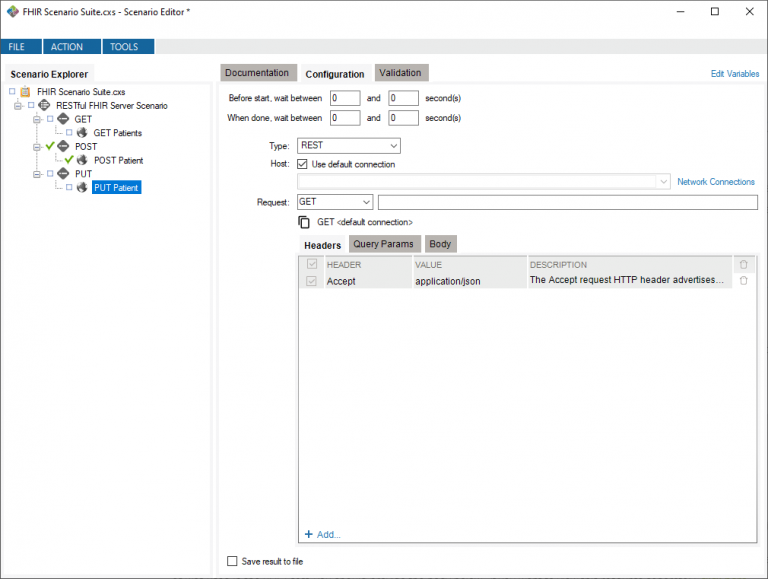
Like you did with the previous tests, you need to configure the PUT task to use the PUT method to update or create a resource.
Use the same FHIR Server as you have been since the beginning of this tutorial, but use the PUT Request method.

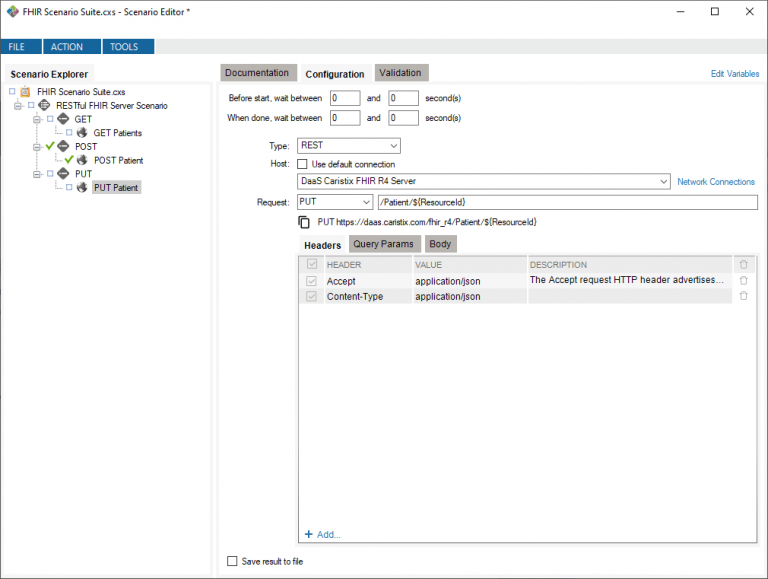
When using the PUT method, you need to specify the resource’s ID in the URL. The ID should also match the ID you’re providing in the payload. However, since you want the id to be randomized every time, you’re going to need to create a variable. Go into the “Edit Variables” menu and create a String type variable called “${ResourceId}. Its generator type should also be a string so that it’s random. To avoid overlapping with existing resources, set both the minimum and maximum length to 10.

Now, you can use that variable both in the request URL and the resource you create. The URL of your request should be /Patient/${ResourceId}.

{
  "resourceType": "Patient",
  "id": "${ResourceId}",
  "identifier": [
    {
      "use": "usual",
      "type": {
        "coding": [
          {
            "system": "http://terminology.hl7.org/CodeSystem/v2-0203",
            "code": "MR"
          }
        ]
      },
      "system": "urn:oid:0.1.2.3.4.5.6.7",
      "value": "654321"
    }
  ],
  "active": true,
  "name": [
    {
      "use": "official",
      "family": "Donald",
      "given": [
        "Duck"
      ]
    }
  ],
  "gender": "male",
  "contact": [
    {
      "relationship": [
        {
          "coding": [
            {
              "system": "http://terminology.hl7.org/CodeSystem/v2-0131",
              "code": "E"
            }
          ]
        }
      ],
      "organization": {
        "reference": "Organization/1",
        "display": "Walt Disney Corporation"
      }
    }
  ],
  "managingOrganization": {
    "reference": "Organization/1",
    "display": "ACME Healthcare, Inc"
  },
  "link": [
    {
      "other": {
        "reference": "Patient/pat2"
      },
      "type": "seealso"
    }
  ]
}

Once again, you need to ensure that the header “Content-Type” with the value “application/json” is present in the Headers section so that the server can parse the body.
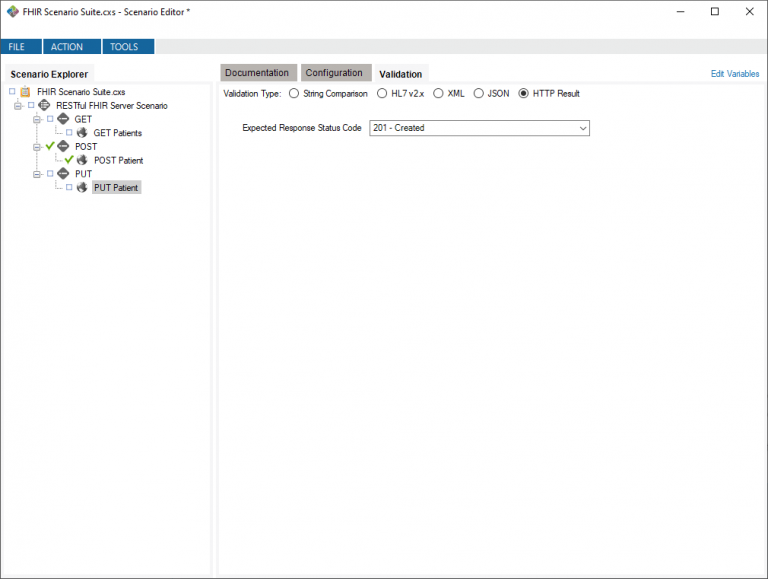
The PUT action calls the “update” method of the FHIR server, like the POST action does the “create” method. As was previously stated, if you provide the update method with an ID that does not exist in the server, it will create a new resource and return the 201 Created HTTP response code. Therefore, your validation needs to verify that that is the response code that is received.
Go into the Validation tab of your task. Make sure that the “HTTP Result” validation type is selected and select the “201 – Created” response as the expected response.
If you run the test multiple times, you will see that it succeeds each time because you’re using a new ID every time.
Using the DELETE method on a FHIR server while providing the ID of the resource in the URL calls the delete method of the FHIR Server, which removes the resource with the specified ID from the server. For this test, you’re going to perform the DELETE method on a resource you will create just before deleting it, in two separate tasks.
When the response has no body (as is the case with DaaS Caristix FHIR R4 Server), the FHIR Server’s “delete” method returns a 204 No Content response code if the content no longer exists. However, it returns the same code if the resource did not exist before the deletion was attempted. This means that you need to verify that the resource was deleted after performing the deletion in a separate task.
Overall, you will need three different tasks in your test: one to create the resource, one to delete it and one to verify that it’s deleted.
Start by creating a new action called “DELETE.”

The first task you perform should be to add a Patient resource to the FHIR server. You’ll want to keep track of the ID you use to create it as you want to use that ID for the deletion and verification tasks.
Therefore, you’ll need to use the PUT method and not the POST method. In fact, you can re-use the PUT task you created in the previous section. You can copy it by right-clicking the task and selecting “Copy,” and you can paste it in your action by right-clicking the action and clicking “Paste.” Rename it to something more relevant to this test, “Initialize Test.”
The second task you perform is the actual body of the test – deleting the Patient resource. You need to create another Execute Web Service task named “DELETE Patient.” Like all other RESTful methods, you need to use the REST Type and use the Caristix FHIR Test Server. The Request type should be DELETE.
Once again, you’re performing an action on a specific Patient resource – the one with an ID matching the variable ${ResourceId}. Therefore, the request URL should be /Patient/${ResourceId}.
The DELETE method does not require or allow for providing a body. Therefore, you do not need to specify a body, nor do you need to specify any extra headers for the request.

When you attempt to delete a resource from the Caristix FHIR Test Server, a 204 No Content response is returned. This means that for the validation step, you need to expect that HTTP Response Status Code.

The last step of this test is the verification task. What you’ll be doing is using the GET method to call the FHIR Server’s read method. The read method is called with the GET method but, unlike the search method, requires a resource ID. If the resource never existed on the server, the HTTP response code is 404 Not Found. If the resource exists, it’s 200 OK. If the resource did exist at one point but has since been deleted, it’s 410 Gone.
That last code is what you expect here, since you’ve deleted an existing resource on the server. Therefore, the Verify Test task should be a GET task on the deleted resource for which you expect the 410 Gone HTTP response code.
Create a new Execute Web Service task and call it “Verify Test.”
In the Configuration tab, use the GET Request type and the DaaS Caristix FHIR R4 Server as your Network Connection.
Set the request URL to be /Patient/${ResourceId}, since you’re still working with the same resource as in your previous tasks.

As previously stated, you expect a 410 Gone HTTP response code. Therefore, in the Validation tab, you should verify that you receive an HTTP Response with the “410 – Gone” code.

If you run the DELETE action, you will see that all three tasks will succeed.
With that, you’ve successfully tested the primary RESTful methods that are used in a FHIR Server. If you want to learn about more testing scenarios, click here to return to the testing tutorials page.
If you want to view the completed project, you can download the project created during this tutorial by clicking here.