What is Gap Analysis in HL7 Interfacing?

what-is-gap-analysis-HL7-interfacingFirst, what’s the problem?

One of the problems we hear about from HL7 team leads and their management is that interfaces take a long time to configure. The reasons why boil down to missing information. Here’s what they typically hear back from the team members:

“The fields need fine-tuning.”

“We don’t know up-front which message types will need the most work.”

“That field mapping was a bear because we couldn’t get a complete code set from the source and destination systems.”

“These code sets have been customized. Each code set changes with the message type.”

Impact: money and time

Integration team leads worry when they hear these statements because these bottlenecks signal delays and project slippage. Problems with configuration prolong testing cycles. They push out go-live – or push burnt-out team members to work even longer hours. It’s demoralizing for the analyst and developer, and frustrating for clinical testers. And the bottom line is: it’s a huge business concern for leadership, who see money and time going down the drain with delays.

There is a way out. It’s called gap analysis.

Just what is gap analysis? Gap analysis is about getting the mapping information upfront. In other words, you compare specs for both the source and destination systems upfront, before a single line of interface code is written and or dragged-and-dropped in the engine.

Your gap analysis must answer the following basic questions:

  1. Do the source and destination systems handle the same message types? If not, what are the differences?
  2. Are there mandatory elements in one system that are optional in the other? Note them down.
  3. Do both systems use the same code sets? With the same values? If not, which values need to be mapped? Do this for every field that needs to be mapped.
  4. Do both systems require the same maximum length for all fields? Note the exceptions.
  5. Does either system use z-segments? How will you handle mapping?


Document your gap analysis

When you consider the number of message types, segments, and fields that are typically needed in an interface, you won’t want to leave gathering this knowledge to a simple scratch pad. You need a template or system to get everything right and hand off this knowledge to a developer.

Some analysts develop Excel templates to manage all this information. We’ve seen templates with 12 to 15 tabs to track. Excel templates also need to be filled out manually. An analyst spends days comparing two product specs side by side and checking sample messages. Then recording their findings across the Excel tabs.

The other option is to look for interface lifecycle management software that will automate the gap analysis process for you. You want software that will compare two system specs side by and side and flag only the differences that will impact the interface.

And the real reason to automate gap analysis: you’ll save even more time. And time = money.

Further resources

Check out Caristix Workgroup for a full interface lifecycle management suite (16-minute on-demand demo available).

Image credit: https://flic.kr/p/9BsXFM


Documenting Interfaces and Workflows for HIEs

Tip 21 in the Interoperability Tip Series

Documenting Interfaces and Workflows for HIEs

This tip is especially relevant for Healthcare Information Exchanges (HIEs), regardless of whether your exchange is internal to an IDN or if it connects multiple regional stakeholders from community hospitals to physician practices.

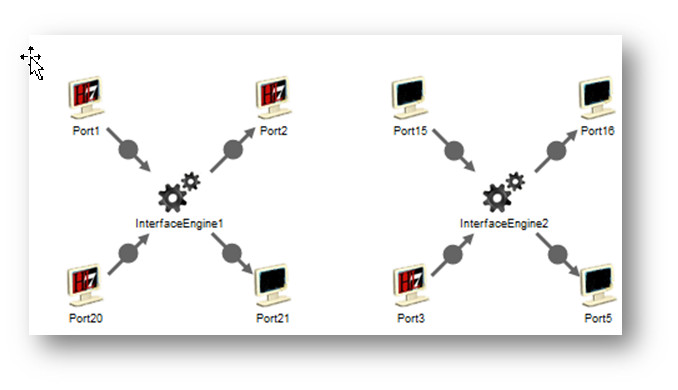
Some interface engines let you view workflow within the engine. But what happens with external systems, such as an HIE transmitting to an internal engine, or multiple systems from different providers connecting across a region? Keeping track of workflow is a major issue in interoperability. You need a way to do this outside of the engine when documenting interfaces and workflows for HIEs and other multi-stakeholder organizations.

While you can track interfaces and workflow to some extent with spreadsheets, and can use a tool like Visio to diagram it all out, you ultimately need a tool that maps process and workflow. Such a tool lets you truly grasp your data and interfaces – not just your interface engine plumbing.

In our next tip, we’ll cover what to look for when you’re documenting and tracking your assets.

Download the HL7 Survival Guide

Download the HL7 Survival Guide

HIEs, Business Models, and Interfacing

Healthcare Information Exchange Types

There are three basic types of healthcare information exchanges (HIEs): some cover a geographic region (for instance, NCHIE in North Carolina), others a community; and yet others that cover a single hospital system (which in turn may be spread out geographically – for instance, Catholic Health Initiatives).

HIE Business Models: Grants vs. Revenue Generation

While some regional and community HIEs got their start via government grants, many of those grants are coming to their end. Even though they might remain as non-profits, HIEs are increasingly moving to revenue-generating business models in order to sustain their operations.

That means HIEs need to be focused on driving down costs for the services they are mandated to provide. Given that many have already invested in infrastructure, their on-going capital budgets have likely stabilized or decreased. Instead they must focus on containing operating expenses. So the key drivers for them are going to be cost-effective delivery, lean production, and efficient maintenance. On the revenue side, they’ve got to ensure their benefits provide sufficient ROI to partner organizations such as hospital systems and physician practices.

The Heart of the Matter at HIEs: Interfacing

A big part of what HIEs do is interfacing – HL7 pure and simple. They need to manage information flow with these systems and more:

  • Commercial labs, hospital labs
  • Immunization registries
  • Cancer registries
  • Other public health reporting and disease registries at both state and federal levels

HIEs also support continuity of care between acute care providers (hospitals) and physicians. With Meaningful Use, CCD is the method of choice. Again, with CCD, many of the issues we run into with conventional HL7 v2 interfacing apply.

In a nutshell, a big part of HIE operations is interfacing. Move the needle with interfacing, and you move the needle on the expense/cost side of their business models and on-going fiscal viability.

The best way to move the needle is to reduce cycle time on the most time consuming part of the interface lifecycle: testing tasks.

HIEs Can Move the Needle

Just how do you get started? Three ways.

1. Get the right requirements up front.

Ensure you have vendor specs, and specs for each site/practice/system. If these stakeholders don’t have specs (or what we call profiles), get sample messages and get analysts to create the specs themselves. Then do the gap analysis between systems, so capture requirements up front. This lets interface developers create a more accurate interface upfront. With high-quality requirements, come high-quality interfaces – and fewer fixes during testing.

2. Automate your testing.

Once you have the interface configured in the test instance of your engine, start testing.  And automate the testing so changes can be implemented faster. With one organization we worked with, before they automated their testing, they spent 2 weeks to test a 15-minute change in the engine. After automation, they spent less than 1 hour. Clear the testing bottleneck.

3. Keep your artifacts for the next go round.

Document it all. You’ll need it as you maintain the interface, and when the source or destination systems are upgraded.

Further Resources

Check out this presentation we gave at the Interconnected Health conference in 2012. It’ll explain why getting the requirements right up front cascades through and drives more cost-effective interfacing.

HL7 Interface Lifecycle Management at Interconnected Health 2012 from Caristix
 

Check out Caristix Workgroup for a full interface lifecycle management suite (16-minute on-demand demo available).

Interfacing Workflows: Start with a Spreadsheet?

Tip 20 in the Interoperability Tip Series

Interfacing workflows spreadsheetsIn our previous tip, we explained why you need to map processes and workflows. Many developers list their interfaces and workflows in a spreadsheet. You’ll find examples of what to track in the HL7 Interface Asset Template here.

While a spreadsheet provides a good start, you need to go beyond to capture the details and interconnections to capture a complete picture of your interfacing workflows. After all, in most hospital and HIE environments, you’ll be dealing with multiple workflows and systems, meaning your systems will be exchanging different sets of data. To efficiently and accurately test and manage all of this over the interface lifecycle, you need a clear mapping of workflows and processes – something that’s nearly impossible to capture in a spreadsheet.

Here’s what you should capture when documenting your interfaces and workflows:

  • Interface names
  • Systems that are linked
  • Connection information (IP address, credentials, port, connection type, location (location may be by unit or by data center)
  • Security: SSL, VPN, firewalls, and any required certificates.
  • Trigger events: List all trigger events and note which ones are used by which systems based on your spec.
  • Connection types: could include database, web service, TCP, HTTP, file, FTP.

Note: here’s why it may make sense to note the data center location. Let’s say you run systems out of two data centers for redundancy, one in Skokie, IL and the other in Hyde Park, IL. If your Skokie, IL data center experiences failures, but your Hyde Park data center is still operating, you’ll know it makes sense to start your troubleshooting in Skokie.

Consider one workflow in which data entered through an interface is first pushed to a database, then to an external system through a web service, and finally to archives or an enterprise warehouse. Without a diagram of this workflow, it’s difficult – if not impossible – to track the data flow. Four months after deploying your interface, you may find that no data has been pushed to the archives.

 Get the Interface Asset Template

Why You Need to Map Processes and Workflows

Tip 19 in the Interoperability Tip Series

dOCUMENT FILEThroughout the Interoperability Tip Series, we’ve stressed the need to complement the message structure and and content details from HL7 profiles with good process and workflow maps for future interfacing asset management. Earlier in the Interoperability Tip Series, Tip 4 emphasized the importance of mapping out the message process and workflow from the very beginning to kick off the planning of an interoperability project.

If you’ve documented your systems and taken the time to map processes and workflows,  it’ll be easier to connect the next system because you won’t need to start from scratch. Workflows also impact your test plan. For instance, all your destination systems might require different inputs from a single source system. As part of your scoping and requirements planning, you’ll need to understand the workflow – for instance, who does what: a physician, a nurse, or a pharmacist? Capturing workflow is also critical for network monitoring down the road so, for example, your IT team will know right away when a system goes down what workflows and processes are affected.

Lifecycle Management Software

Check out Caristix Workgroup for a full interface lifecycle management suite (16-minute on-demand demo available).

HL7 Messages – Don’t Fall into the Beginner’s Trap

Tip 18 in the Interoperability Series

What’s The Big Deal?HL7 messages - beginner's trap

If you’re just getting your feet wet with clinical and medical applications, you might think: “What’s the big deal? I’ll just hit Google for some sample HL7 messages and get started that way.” 

Don’t do that! If you do, you’ll get some basic structures right – like pipes and carets. But you won’t have any information about the interface you’re trying to build: the message types it uses, the segments and fields, positions, optionality. Yet developers need the information in messages in order to build a solid set of requirements for the actual interface. That’s why real-world messages are the best option.

For instance, let’s say that you’re interfacing with a lab system. The lab is often the area with the largest number of custom data values. After all, how you treat a lab order and lab results varies by hospital and by vendor. To develop a viable interface, you need to work with realistic messages.

At the same time, many hospitals employ email security measures that block the sending of any emails containing HL7-formatted content – even if it is de-identified. So whatever you find on the Internet is likely to be so generic that it will be practically useless.

Lifecycle Management Software

Check out Caristix Workgroup for a full interface lifecycle management suite (16-minute on-demand demo available). Get started on the right foot and avoid the beginner’s trap. 

Sneak Peek – New Caristix CDA Functionality

Brian Ahier is right

Before you read any further, please go right now and check out what health data exchange expert Brian Ahier has to say about C-CDA on the HIStalk blog.  He is right on the money about the need to clear up the problems with CDA/C-CDA documents. Once you’ve read his article, come back here and you’ll get exactly why  we’re building our new CDA functionality around gap analysis.

A bit of context. A few weeks back we talked about the need for gap analysis and the Clinical Continuity of Care Document (CCD).  Now we’re advancing on building Clinical Document Architecture (CDA) functionality into the Caristix platform, starting with the XML schema for CCD.

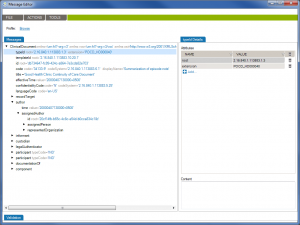
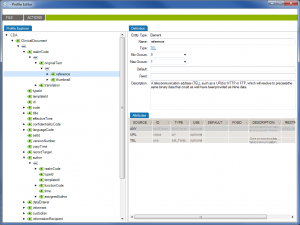
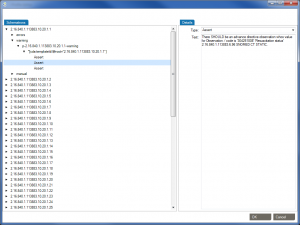
First of all, Caristix software can now get your schemas, messages (or documents), and schematrons set up in our Profile Explorer (click images to enlarge):

CDA-message-editor
Message Editor


CDA Profile Editor
Profile Editor


CDA Schematron Editor
Schematron Editor

De-identify CDA documents

Profile Explorer will allow you to manage custom elements and variations. Next on our list is de-identification, so you can take production CDA documents and remove the PHI. You’ll then be able to share those de-identified documents for testing and troubleshooting.

Creating CDA specs or schemas

We’re also working on reverse engineering. That means you’ll be able to create the schema directly from a single CCD document or batch of documents, saving hours of documentation and schema creation for validation testing.

CDA and gap analysis

Another feature we’re working on is gap analysis specific to CDA. So you’ll be able to compare two schemas and document the differences.
Gap analysis is the core need when it comes to CCD implementation to exchange data between EHRs after episodes of care (in HIEs and other data exchange platforms). To understand why, let’s review what a schema is.

XML schema for CCD

To simplify, the schema is like a specification – it tells you how to organize the document structure and content. The schema and the rest of the standard tells you that a CCD generated by any compliant system should be readable by any other compliant system.

That’s how the standard is meant to work.

But what we’re seeing among our customers is far from full compliance.  (And as Brian Ahier mentions on HIStalk, outright errors are all too common.)

Even though the standard is tightly defined, our customers are seeing major and minor deviations and customizations among vendors. Examples include:

  • Implementing just 6 of the 7 elements to be documented during a transition of care.
  • Constrained terminology, so a vendor doesn’t fully support the mandated vocabulary.
  • Use of incompatible optional elements.

 
The only way to catch these deviations is to run a gap analysis – either manually by comparing documents or specs side by side, or through software such as the Caristix platform. Gap analysis is a must-do  to gather implementation requirements and to ensure that you’re capturing the right use cases for validation before go-live.

Avoiding CCD errors

Just remember: if you’re implementing CCD exchange, attestation is one thing. Real-world implementation, especially for HIEs, is another. That gap analysis is the key to making sure data exchange takes place error-free in a production environment.

That’s what we’re delivering with the new CDA functionality.

Creating HL7 Test Messages? Consider De-identification

Tip 17 in the Interoperability Tip Series

HL7 Data for Testing

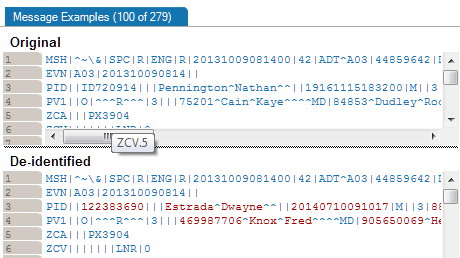
De-identification-HL7-messagesIn last week’s tip on HL7 test reporting, we suggested that you use production data for your testing. That said, you obviously can’t use real production data. You need to find a way to remove protected health information (PHI).

That’s where a technique known as de-identification can help. You keep the clinical workflow in the messages, but you remove patient identifiers and replace them with fake values. You can also replace them with off-the-wall fake values for edge cases.

And remember – even employer information can contain PHI. For instance, if two of your patients work for say, a 5-person law firm, it would be pretty easy to search publicly available information sources and re-identify them. You must remove their employer names – or insert replacement names – if you want to use this data safely. (For more on de-identification, check out this blog post.

Here’s what to keep in mind when you de-identify your production data:

  • Satisfy HIPAA. Remove the 18 identifiers designated by HIPAA as protected health information (PHI).
  • Maintain message flow. If “John Doe” in your production data becomes “Michael Smith” in your test messages, ensure that Michael Smith in your A01 admission message is the same Michael Smith upon discharge.
  • De-identify data in z-segments and unstructured notes. PHI can hide there.
  • Message volume. Aim for at least a week’s worth of messages and ideally a few months’ worth.
  • Traceability. Record which data was de-identified and which fields and data types were transformed.

Without the right message samples and test messages, you’ll run into the issues we discussed in previous tips, namely lack of updated vocabulary and potential for downtime if messages contain unexpected values.

Remember, these messages are how you test the data format and confirm that you’re not introducing errors. For example, you don’t want to find out after go-live that your interface doesn’t recognize a last name with an apostrophe.

De-Identification Software

Caristix provides de-identification software for HL7 messages. Check out Caristix Workgroup for a full interface lifecycle management suite (16-minute on-demand demo available), and Cloak, the standalone de-identification application. You can also download a Cloak trial to give it a spin.

HL7 Interface Testing Checklist

hl7-testing-checklistOver the past few weeks, we’ve reviewed multiple HL7 testing topics. So you know how critical it is to test interfaces during interface configuration, the validation phase, and during maintenance.   This HL7 interface testing checklist will help you design a testing process that covers your most important needs. And if you already have a testing process in place, it will help you identify any areas of concern.
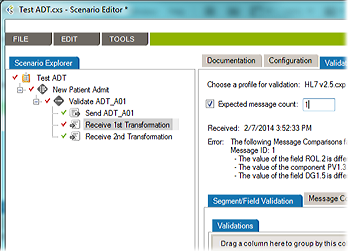
1. We’re running tests to make sure we’re not injecting errors during interface development, configuration or during maintenance.
 
This type of test is called regression testing. It’s important to do this as you make major and minor changes to the interface.

 2. We’re positive our tests cover our interoperability requirements because:

  • We confirmed our interface engine handles our standard workflows.
  • We test each system independently to make sure they work separately.
  • We verifying our edge cases anticipating unexpected values.

We test network infrastructure so we know how we impact overall infrastructure performance.

3. Our clinicians trust our validation process knowing they’ll have consistent data flow in their clinical applications.

If they have concerns, you need to build in checkpoints the testing process.

4. We run the most critical tests across all interfaces for all sites.

Document your most critical tests, and document that you’ve run the tests.  

5. We’re testing with de-identified sample messages drawn from production data in order to cover our requirements.

Production data is realistic and will cover your use cases during testing. But it’s critical to remove PHI.

6. We’re testing in an independent test environment using the same configuration as our production systems.

Don’t use your production environment for testing. The risks are too great.

7. We document our testing process completely to ensure traceability and repeatability.

Keep this information accessible.

8. Testing takes us longer than any other part of the HL7 interface lifecycle.
    
If you checked this statement, you should consider test automation. Test automation will enable you to speed up testing and increase your test coverage.

 9. Our test reports include the number of times a test was run and duration, test results, the messages used and a summary of the test scenarios used.

How efficient is your testing process? Is it time to automate your testing?

See how Caristix technology automates testing. Check out this 2-minute excerpt on interface testing and validation from our on-demand demo. See how to prevent costly project rework and delays.

HL7 Test Reporting

Tip 16 in the Interoperability Tip Series

The past few tips have covered HL7 testing and test automation. This one covers what you should do with HL7 test reporting.

Creating Test Reports    

Caristix Test Module

As part of the testing process, you’ll want to run reports. The reports should document the following: 

  • The number of times the test was run, as well as test duration – if you’re sending messages, this helps you understand performance.
  • Test results, including positive validations and failures.
  • The messages that were used; note the data source (SQL queries pulling from a database, an HL7 message feed, a batch file).
  • Summary of test scenarios that were run.

Just as you need sample messages elsewhere in the interfacing lifecycle (for instance, scoping), you need them for testing, too.

As a reminder, sample messages give you custom formats, structure, and data values.

For example, imagine you’re interfacing the lab information system and the ADT. You’ll want to look at the issues that were highlighted during the gap analysis. Your test messages need to cover your use cases and the following:

  • Events that are exchanged
  • Code sets/vocabulary and varying field lengths
  • Optional segments and fields, especially varying optionality  

Go with Production Data

Now about the sources of your messages: we’re going to come right out and say it – you need production data. Here’s why: Once you have the right message samples and test messages, you need to make sure you have a sufficient volume of quality test data. And your production data accurately reflects the data you work with day in and day out, both in data type and format as well as volume. And that means you’ll be able to accurately test for load and performance, and avoid message workflow problems that can bring down interfaces.

In our next tip, we’ll explain how you can de-identify production data to use safely in your test system.

The Caristix 3.1 release focuses on test automation. These new features add a lot of power to the Caristix platform. To get started on using them, check out our new test automation tutorial series.