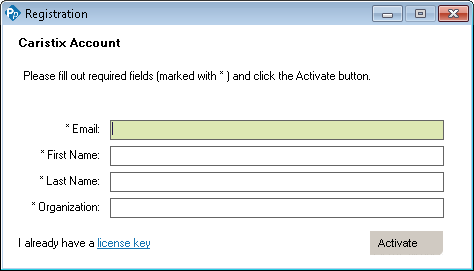
 If you have a trial version, you will need to purchase an annual license to continue using Pinpoint after the end of the trial period.
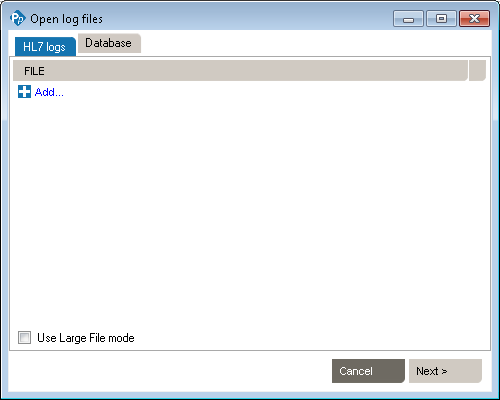
This function lets you save a log file or save filtered or sorted results. You would save results in order to document an issue or explain message flow to a colleague or customer.
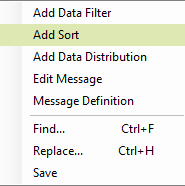
(The Save command is also available in the right-click dropdown menu.)
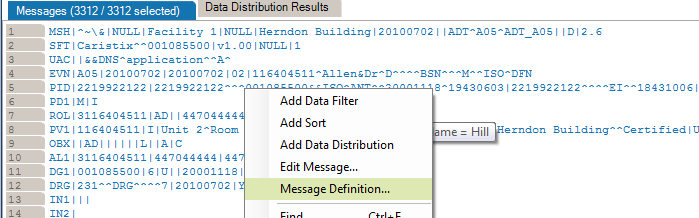
By default, Pinpoint saves the file to the My Documents folder. To save the file to a different location, select another folder on your computer or network. You can also save by right-clicking within the Messages area. A dropdown menu appears. Select Save Messages.
You can save the rules you create for searches and filters as a file. A Search and Filter Rules File is used to persist Data Filters, Sort Queries and Data Distribution entries for reuse.
* You can also open a Search and Filter Rules file by right-clicking anywhere in the Data Filter, Sort or Data Distribution section and click the “Open Search and Filter Rules…” menu.
* You can also save a Search and Filter Rules file by right-clicking anywhere in the Data Filter, Sort or Data Distribution section and click the “Save Search and Filter Rules…” menu.
If you’ve already opened a Search and Filter Rules file, it will be added to the recent files for quick access. To open a recently opened file…
Pinpoint software includes several features that provide detailed information about the messages and values contained in HL7 logs.
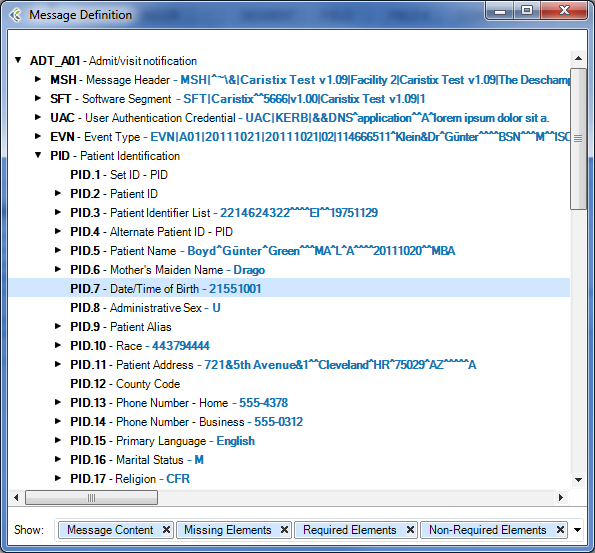
When you are analyzing a message log, you sometimes need to quickly capture an overview of a message or segment. Pinpoint provides a message definition feature.
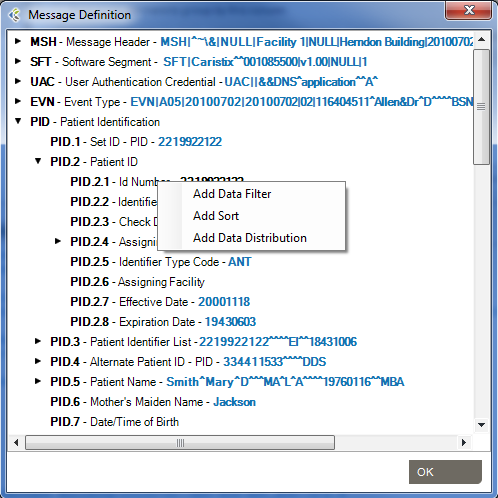
In the Messages area, right-click anywhere in a segment and select Message Structure. A Message Structure dialog box appears, with details on the field position, field names, and values in each field.
When you are analyzing a message log, you sometimes need to know the position of a field. Pinpoint lets you determine the position (and the name of the field) without counting pipes.
Click anywhere in the Messages area, then hover over a field. A mouse-over tooltip appears, listing the field name and position.

Check “Use Large File mode” when loading files above 10MB in size. (This option will deactivate the Sort, Replace and Edit Message features.)
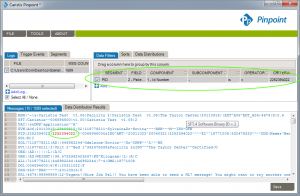
Data filters let you set up queries to find messages containing specific data such as patient IDs, names, and order types codes. Queries can filter on specific message elements: segments, fields, components, and subcomponents.

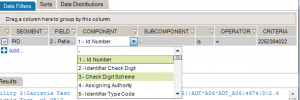
This is the recommended method for building data filters. Once you’ve built a query, you can then modify the Filter Operators to change your filter criteria.
This is an alternate method for building data filters and is helpful when applying complex filter operators.
 Apply operators. Select “IS” if you want your results to INCLUDE the data you’ll be filtering on. Alternatively, select “IS NOT” if you want your results to EXCLUDE the data you’ll be filtering.
You can also add filters from the Message Definition tree. To do so:
Data filter queries can be made case-sensitive. This is helpful when you need to identify data that might have been entered in all caps (JOHN SMITH) instead of title case (John Smith).
You can create filters that query the entire log, instead of a single segment or field. Simply omit the segment and field from the filter. The results in the Messages area cover all occurrences of the value you specified in the filter.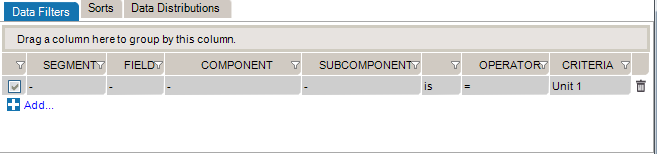
While editing your filters, you can switch between Basic and Advanced Mode. Advanced Mode shows you advanced settings for your filters. These settings help you to construct more complex filters using AND/OR operators and parentheses for nesting. Otherwise, each filter will be applied one after the other.
If your filters contains advanced settings and you switch back to the Basic Mode, these settings will be lost.

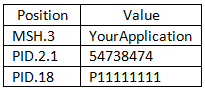
In this example, we want to create filters to get messages where (MSH.3 = MyApplication) and (PID.2.1 = 54738474) or (PID.18 = P5847373).
These filters will include the following messages:
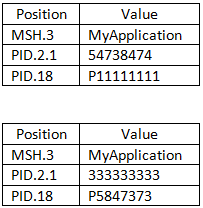
They will exclude these messages:
Data filters let you select a subset of messages from the logs you load in Pinpoint. The operators let you build filter queries, ranging from simple to complex. The most basic operator set consists of the us of “is” and “=”.
![]()
These are the default operators in the Add Data Filter command, available on the right-click dropdown menu in the Messages area.
The other data filter operators let you build sophisticated filters for analyzing the HL7 data in your log. (Learn how data filters work in the section on Working with Data Filters.)
Operator | |
| is | Includes messages that contain this data |
| is not | Excludes messages that contain this data |
| = | Covers messages with an exact match to this data (this is like putting quotation marks around a search engine query) |
| < | Less than. Covers filtering on numeric values. |
| <= | Less than or equal to. Covers filtering on numeric values. |
| > | Greater than. Covers filtering on numeric values. |
| >= | Greater than or equal to. Covers filtering on numeric values. |
| like | Covers messages that include this data. Covers filtering on numeric values. |
| present | Looks for the presence of a particular message building block (such as a segment, field, component, or sub-component) |
| empty | Looks for an unpopulated message building block (such as a segment, field, component, or sub-component) |
| in | Builds a filter on multiple data values in a message element rather than just one value. |
| in table | Looks if the data is in a specific table of the referenced Profile. |
| matching regex | Use .NET regular expression syntax to build filters. For advanced users with programming backgrounds. Learn more about regular expressions here:
|
Sort queries sort a log on a message element (segment, field, component, or subcomponent).
Sorting data is useful when you want to group messages by criteria such as patient name, date, or location.

This sort on MSH 6 reorders messages by the name of the receiving facility, in this case a patient care location.
This is the recommended method for building sorts. Once you’ve built a query this way, you can modify the Filter Operators to change your filter criteria.
This is an alternate method for building sort queries.
You can also add sort queries from the Message Definition tree. To do so:
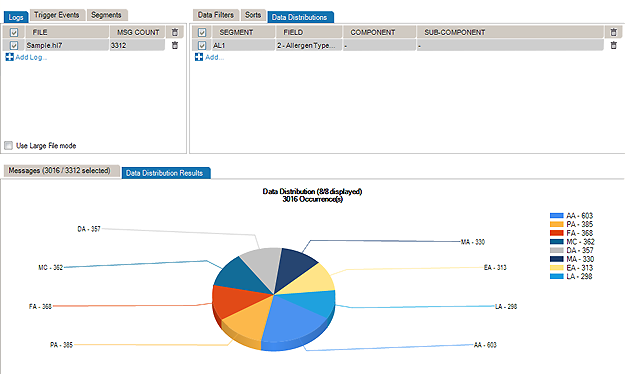
The Data Distribution feature displays the data values in a field. For instance, it helps you quickly figure out what codes are used in a specific field or how often a specific code is used.
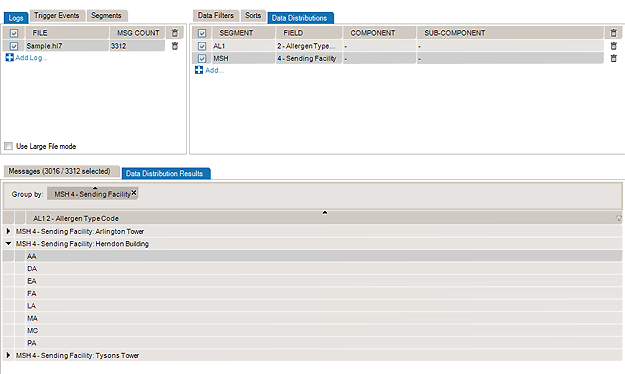
Data Distribution can also help you analyze how one field can impact other fields in terms of data and content. With Data Distribution, for example, it’s possible to get the list of lab result codes for each lab request codes within a set of sample messages.
All charts and tables can be copied and pasted to Word and Excel.
The pie chart displays the values that populate the field, as well as how often those values occur in the field.
The report displays which Allergen Type Code is sent, grouped by Sending Facilities.

You can also add data distribution fields from the Message Definition tree:
From the Data Distribution table view, you can add a Data Filter in order to find messages containing specific data:
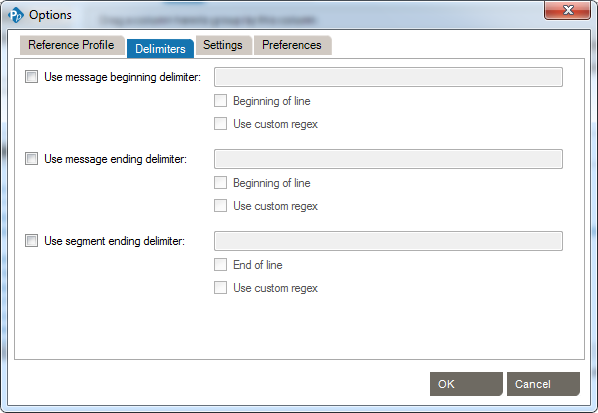
Some interfacing technologies output non-standard message logs. In a raw state, they may be impossible to parse against an HL7-compliant standard. By adding a message prefix representing the extraneous data, you can load these logs in Pinpoint.
To add a message prefix:
You can also use message and segment ending delimiters.
Learn more about regular expressions here:
Pinpoint works by parsing messages against a reference profile (or specification). The default setting is to parse against the HL7 version specified in the Version ID field of the MSH segment. However, you can also set the reference profile manually, as follows:
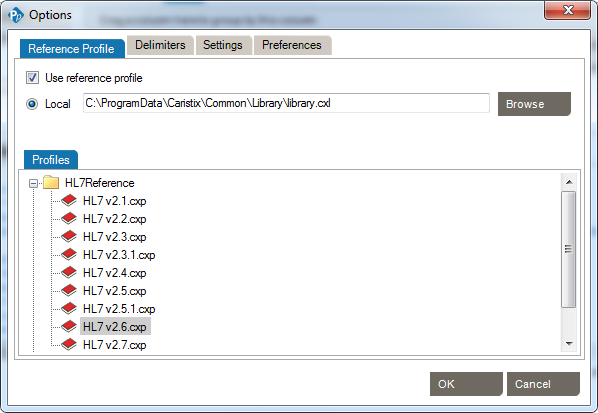
The default profile library is in %AllUsersProfile%\Application Data\Caristix\Common\Library\library.cxl. If you want to load an alternate profile library, click the Browse button.
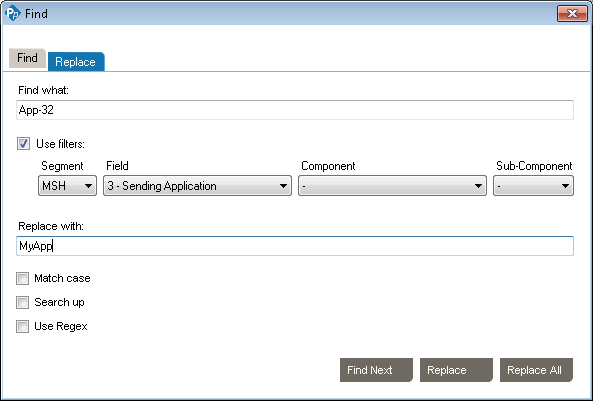
You can find and replace values in your messages. The Use filters option lets you find and replace within a field.
You can also use the Replace tab and specify a replacement value