Operating system: Windows 7, Windows 10, 32 or 64-bit editions
Memory: 4Gb of RAM
.NET Framework 4.7.2
Table des matières
Getting Started
Install and Register Caristix Message Player Software
Install Caristix Message Player by clicking on the installation file (.msi file) you received. This will launch the installation wizard.
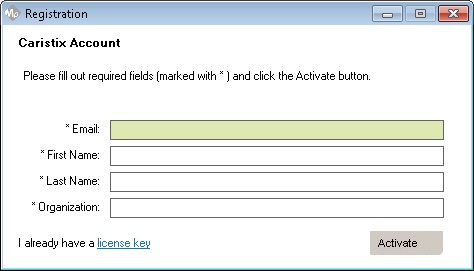
After installing, launch the software, and fill out the Email, First Name, Last Name and Organization fields in the registration form.
Click the Activate button.
Play (Send) Messages
Router Functionality in Message Player
With Message Player, you can send HL7 messages stored in flat files to another system. To send messages:
Add the file(s) containing messages you want to play to the playlist
In the playlist section, click Add..
Pick the file(s) you want to play
Click Open
Play the messages
Click the Play button
Provide the IP address and port of the system listening to the messages (see the configuration section for more details)
Click OK
Click Stop at any time to interrupt transmission.
Message Player will send HL7 messages contained in playlist file(s). Messages will be sent one at a time, with a wait for acknowledgment (ACK/NACK) between messages.
Configuration
The Play Configuration Panel
Unless deactivated, the Play configuration panel should be triggered each time you hit the Play button. You can also access the panel by clicking the gear icon on the upper-right corner of the main window, then selecting the Play tab.
The configuration panel contains 2 items:
IP Address: This is the IP address of the system you want to send messages to. The IP address should be a series of numbers (example: “192.168.123.123”). If you want to send messages to your local host, provide your IP address (localhost 127.0.0.1 is not supported).
Port: This is the port the receiving system is listening to. Make sure that firewalls are configured correctly in order to enable Message Player to establish a TCP connection to the destination server on that port. Contact your organization’s system administrator for help with this task.
Record (Receive and Store) Messages
Listener Functionality in Message Player
With Message Player, you can receive HL7 messages from a system and store them in flat files. To record messages:
Click Record button
Provide your IP address and port you want to listen to (see the configuration section for more details)
Choose how you want the message to be stored (file split mode)
Click OK
Enter the file name and file type
Click Save
The recording starts. Click Stop at any time to interrupt recording.
Message Player will listen to HL7 messages and store then in files based on the split mode you select. For each message received, an acknowledgment (ACK/NACK) will be sent as a response.
Configuration the Record Panel
Configure the Record Panel
Unless deactivated, the Record configuration panel should be triggered each time you hit the Record button.
You can also access the panel by clicking the gear icon on the upper-right corner of the main window, then selecting the Record tab.
The configuration panel contains 3 items:
IP Address: This is your IP address. The IP address should look like a series of numbers (example: “192.168.123.123”). Localhost 127.0.0.1 is not supported.
Port: This is the port you want to listen to. Make sure that firewalls are configured so that the sending system can establish a TCP connection to Message Player on that port. Contact your organization’s system administrator for help with this.
File Split Mode
All in one file: No split occurs. This is the optimal setting when you need to record a small number of messages.
Size: Split occurs when file reach a preset size (in MB). A number will be appended to the file name.
Message count: Split occurs when the file contains a preset number of messages. A number will be appended to the file name.